Learning how to lay stone pavers is one of those projects that looks simple from a distance, then quickly reveals how much precision lies under the surface. A beautiful patio, walkway, pool deck, or driveway is never just about placing stones in a nice pattern. The real work happens in the planning, excavation, base preparation, drainage, leveling, edge restraint, joint filling, and compaction.
When each step is done correctly, stone pavers can create an outdoor surface that feels solid underfoot, handles weather well, and adds real charm to the property.
So let’s discuss in this article how to properly approach the installation of stone pavers from a professional point of view.
Read also: How to repair sunken pavers – causes, fixes, and prevention
Jump to:
How to Lay Stone Pavers: It All Starts With Planning the Surface
Before even touching a shovel, it is always important to understand how the space will be used. A small garden path does not need the same structure as a driveway. A patio for outdoor dining needs comfort, stability, and good water runoff. A pool deck needs traction, heat awareness, and materials that feel good under bare feet.
This is why how to lay stone pavers begins with design, because every technical decision depends on the purpose of the area.
Measuring, Marking, and Choosing the Pattern
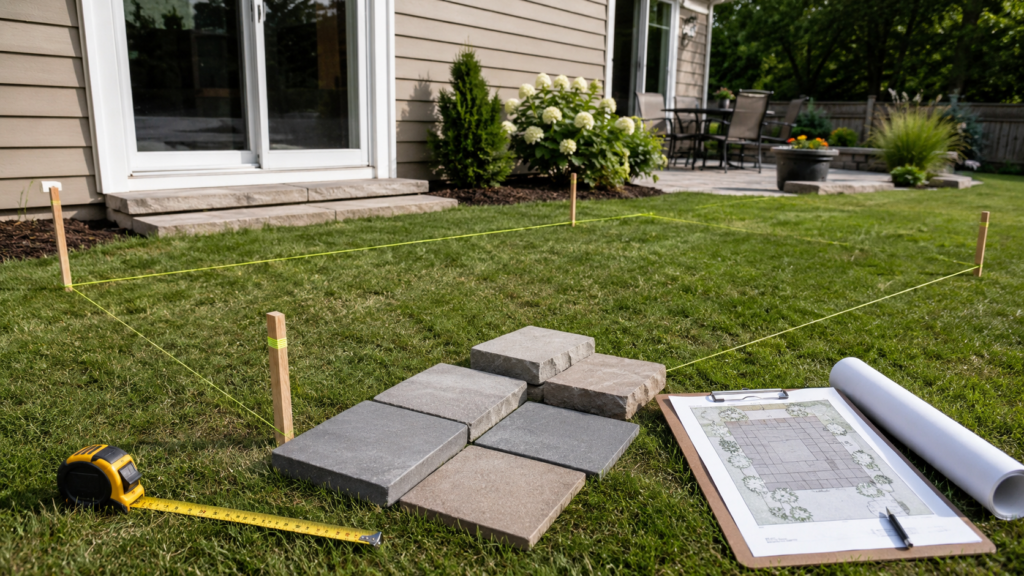
The first step is measuring the full project area and marking it with stakes and string. This creates a visible outline and helps define square footage, material quantity, and cutting needs. I also recommend planning the paver pattern early.
Running bond, basket weave, modular layouts, and natural irregular stone patterns all affect waste, cuts, and installation time. If necessary, don’t be afraid to put your vision on paper and try to draw what you imagine. It can be of great help to the development of the process.
A good layout also considers transitions. Where does the paver area meet grass, concrete, a doorway, or a driveway? These edges need to be clean and stable.
Slope and Drainage
When people ask us here at JS Brick how to lay stone pavers, drainage is usually the part they underestimate.
Pavers should never be perfectly flat. A slight slope is necessary so the water can move away from the house, seating areas, and structural foundations. Without that slope, water can sit on the surface, soften the base, encourage weeds, and eventually create uneven spots.
For areas prone to heavy rains, drainage deserves even more attention because rain can test a hardscape very quickly. In simple words, water always wins if the installer ignores it. The trick is making sure water wins by going exactly where we want it to go.
Preparing the Base
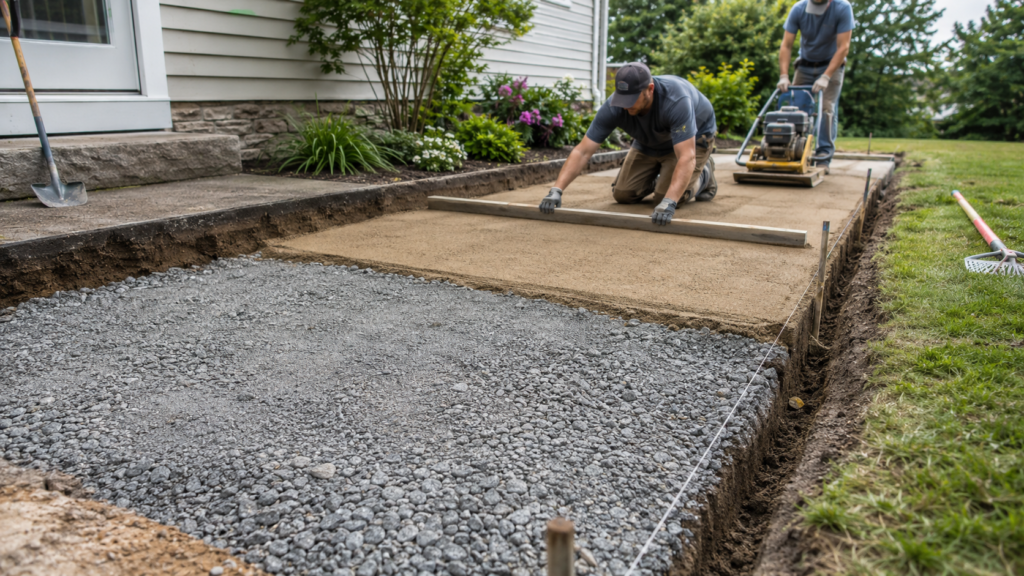
The base is the quiet hero of the entire project. Nobody compliments the base at a backyard barbecue, which is a shame, because it is doing most of the heavy lifting while everyone talks about the grill. If the base is weak, the most beautiful stone pavers in the world will eventually shift, sink, or wobble.
Excavation and Soil Preparation
Every excavation starts by removing grass, roots, loose soil, and organic material. The excavation depth depends on the project type, paver thickness, bedding layer, and base thickness. A pedestrian patio usually requires less depth than a driveway, because vehicle loads demand more support.
After excavation, the soil must be compacted. This step reduces future settling. If soft areas remain, they should be corrected before the base material goes in.
Adding and Compacting the Base
A crushed stone base is commonly installed in layers and compacted thoroughly. The goal is a firm, even foundation that drains properly.
The bedding layer comes after the compacted base. This is usually a layer of sand that helps create a smooth, level surface for the pavers. It should be screeded evenly, then left undisturbed.
The Concrete Masonry and Hardscape Association also provides guide specifications for interlocking concrete paver construction in the United States and Canada, which reinforces how important proper installation standards are for long-term performance.
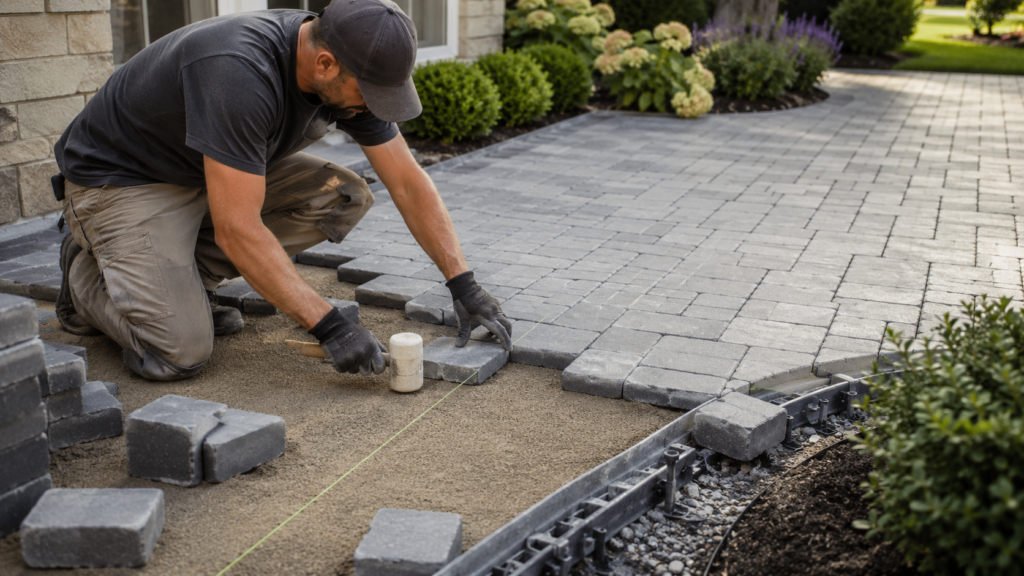
How to Lay Stone Pavers
Once the base and bedding layer are ready, the visible part of how to lay stone pavers (which is usually what people are really interested in) finally begins. This is the satisfying stage, but it still requires patience.
Pavers should be placed carefully, following the planned pattern and alignment. The installer should work from the already laid surface whenever possible, instead of stepping directly on the bedding sand.
Setting the First Pavers Correctly
The first row controls the rest of the project. If it starts crooked, the mistake usually grows as the installation continues. I like to use string lines as a guide and check alignment frequently. The pavers should sit close together according to the chosen joint style, while still allowing space for joint material.
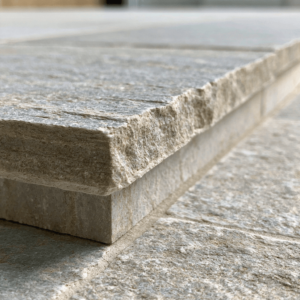
Natural stone pavers can vary slightly in thickness and shape, so adjustments may be needed during installation. This is one reason experience matters. Stone has personality. Sometimes, too much personality. A good installer knows how to work with variation without letting the surface look chaotic.
For homeowners comparing materials, our guide to flagstone pavers explains what flagstone is, how it compares with other paver options, and what to expect from installation and maintenance. That kind of material knowledge helps prevent surprises once the project is underway.
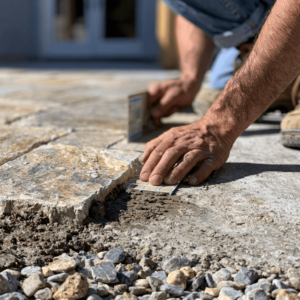
Cutting, Edging, and Locking the Field
Most projects require cuts around borders, curves, steps, drains, and fixed structures. These cuts should be measured carefully and made with the right equipment. Clean cuts create a finished appearance and help the pattern look intentional.
Read more about cutting pavers in this article.
Edge restraints are also essential. They keep the pavers from spreading outward over time. Without edge support, traffic, water, and soil movement can slowly push the perimeter out of place. After the pavers are laid and the edges are secured, the surface is usually compacted to help seat the pavers into the bedding layer.
Joint Sand and Surface Stability
This stage is where the project becomes durable, clean, and ready to use. Joint filling, compaction, cleaning, and sealing all affect how the surface performs over time. These details are easy to rush, but they make a major difference.
Joint material helps lock the pavers together and reduce movement. Polymeric sand is used because it hardens after activation and helps resist erosion, ants, and weed growth. Southern Living recently noted that polymeric sand can help fill joints and reduce weed problems when applied correctly, especially in suitable joint widths.
JS Brick: Professional Help with Hardscape Design in Florida
As you can see, knowing how to lay stone pavers is not just a matter of placing pavers semi-randomly in the ground. It involves a lot of work and planning, with the actual laying of the pavers themselves being the (surprisingly) simplest part of the process.
As in any hardscape project involving pavers, for a long-lasting and quality installation, the focus should be on a good base. And the best way to make sure you end up with the best possible base is to hire professional hardscape contractors to help you.
So don’t take any chances and find a professional you can trust in your area. And if you happen to be around Sarasota, FL, that’s our area of activity, so we here at JS Brick would be glad to offer our help.
For 26 years, we’ve been helping homeowners to achieve the project of their dreams, so reach out to us anytime for a free estimate so you can be added to this long list of satisfied customers.