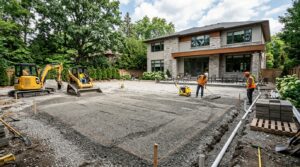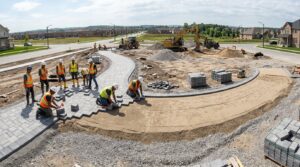
Your pavers can only be as flat as the sand beneath them. If the screeded bed has waves, dips, or thick spots, every paver you lay will telegraph those flaws to the finished surface. We have torn out patios across Sarasota where the pavers looked fine from the curb, but the homeowner could feel the wobble underfoot and watched water pool after every afternoon storm. Almost every time, the problem started in the sand layer.
Knowing how to screed sand for pavers is what separates a surface that locks tight and drains clean from one that settles, rocks, or puddles within a year. This guide walks through the process the way our crew does it on jobsites in Sarasota, Venice, and Bradenton: base check first, correct sand, right tools, and a technique built for Florida’s rain and heat.
Jump to:
Check the Base Before You Touch the Sand
The most common screeding mistake happens before the sand bag is even opened. It is trying to fix a bad base with extra sand.
A screeded bed follows the contours of whatever sits beneath it. If your compacted crushed rock base has a 2-inch dip in the center, the sand in that spot will be 2 inches thick instead of 1 inch. That thick pocket compresses differently under load, and within months, you have a low spot in the finished surface that holds water.
CMHA’s construction specification recommends the compacted base be within 3/8 inch over a 10-foot straightedge before bedding sand goes down. That is a tight tolerance, but it is the tolerance that keeps the sand layer uniform and the pavers stable long term.
How to check: lay a straight 10-foot board (or a factory-straight aluminum level) across the base in multiple directions. Mark any spots where more than 3/8 inch of daylight shows under the board. Those areas need additional compacted base material, not more sand.
In Sarasota, our base is typically 6 to 8 inches of compacted limerock for patios and 8 to 12 inches for driveways, depending on soil conditions and traffic load. Florida’s sandy subgrade compacts well when properly prepared, but it also drains fast, so the aggregate base needs to be dense and stable before the bedding sand goes on top.
Once the base passes the straightedge test, the next question is what sand belongs on top of it.
Which Bedding Sand to Use
Not all sand is paver sand. The industry standard for conventional sand-set interlocking concrete pavers is washed concrete sand meeting ASTM C33 gradation, with no more than 1% of material passing the No. 200 sieve. That 1% fines limit is the number to remember. Excess fine particles trap moisture, resist drainage, and can migrate into the aggregate base under traffic, leaving voids beneath your pavers.
Here is the ASTM C33 gradation range for paver bedding sand:
| Sieve Size | Percent Passing |
|---|---|
| 3/8 in. (9.5 mm) | 100 |
| No. 4 (4.75 mm) | 95-100 |
| No. 8 (2.36 mm) | 80-100 |
| No. 16 (1.18 mm) | 50-85 |
| No. 30 (0.60 mm) | 25-60 |
| No. 50 (0.30 mm) | 5-30 |
| No. 100 (0.15 mm) | 0-10 |
| No. 200 (0.075 mm) | 0-1 |
You do not need to memorize this table. But you do need a supplier who can confirm their sand meets it. Ask for the gradation test sheet. If the supplier cannot verify ASTM C33 or equivalent, find a different source.
In Sarasota, we see two substitution mistakes at supply yards more than any other:
- Masonry sand: too fine, holds too much moisture, shifts under load. Belgard’s technical guide explicitly rejects masonry sand, screenings, and stone dust for the paver setting bed.
- Local fill sand: inconsistent gradation, often loaded with fines and organic material. It may look like sand, but it will not perform like bedding sand under pavers.
The cost difference between proper bedding sand and the wrong material is a few dollars per ton. The cost of tearing out settled pavers later runs into thousands.
One clarification that trips up homeowners: bedding sand and joint sand are not the same thing. The bedding layer sits beneath the pavers. Joint sand (often polymeric sand) fills the gaps between pavers after installation. Different materials, different positions, different functions.
If your project uses permeable pavers, the bedding material is completely different: open-graded No. 8 stone at a 2-inch depth, not sand. Sand would clog the drainage pathways that make permeable systems work. The two assemblies are not interchangeable.
With the right sand identified, you need a few simple tools to control its depth and slope.
Tools for Screeding
The setup is simpler than most people expect.
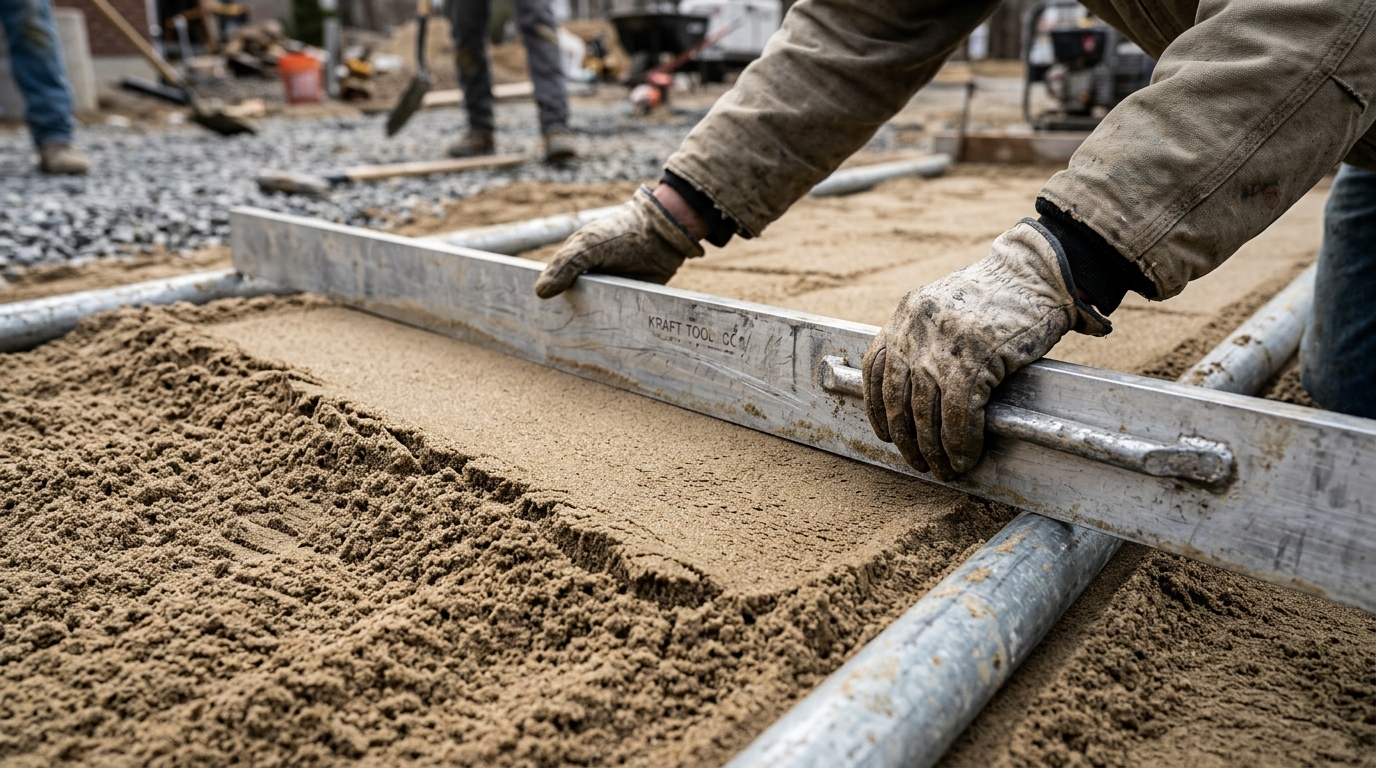
You need two or more straight metal pipes or electrical conduit with a 1-inch outside diameter. These are your screed rails: the guides that control sand depth. Rigid steel EMT conduit holds a truer line than PVC, which can flex under the weight of the straightedge. We use 10-foot sections, which cost a few dollars each at any electrical supply or hardware store.
You need a straight 2×4 or aluminum straightedge, long enough to span between your rails with about 6 inches of overhang on each side. Check it for warps before you start: lay it on a flat surface and look for daylight underneath. A warped board produces a warped sand bed.
Beyond that: a string line and stakes (or a laser level) for setting finished elevations and slope. A flat shovel and a garden rake for spreading sand. A hand trowel or magnesium float for filling rail grooves after removal. A tape measure. A carpenter’s level.
That is the entire list for a residential patio. Adjustable hand-screed systems exist for contractors doing this daily, but a straight board on accurate rails produces the same final geometry. The tool does not make the bed flat. The rail placement does.
Now, the sequence that ties base, sand, and tools together.
How to Screed Sand for Pavers, Step by Step
Step 1: Set Your Screed Rails to the Finish Plane
This is the step that determines everything. The rails control the sand depth, the drainage slope, and the final paver elevation.
Place rails directly on the compacted base, parallel to each other, 6 to 8 feet apart. The span between rails needs to be shorter than your straightedge so the board can rest on both rails with room to spare on each end.
Here is where the math matters. A 1-inch-OD pipe sitting directly on the base puts the top of the pipe exactly 1 inch above the base. When you pull the straightedge across the rails, the screeded sand fills to that height: 1 inch. This is the nominal bedding thickness that most manufacturer specs call for.
To calculate your finished paver elevation from any point:
Finished surface = base elevation + 1 inch (sand bed) + paver thickness, minus roughly 1/4 inch (compression during plate compaction)
For a standard 2 3/8-inch (60 mm) concrete paver, that works out to the base plus about 3 1/8 inches. If your base was excavated and compacted to the correct depth below finished grade, the 1-inch pipe placed on the base produces the right screeded elevation without shimming.
For slope (covered in detail in the next section): if you need 1/4 inch of fall per linear foot, over a 10-foot run the low-end rail sits 2 1/2 inches lower than the high-end rail. Use a string line or laser to set this precisely before spreading any sand.
Step 2: Spread Sand Between the Rails
Dump sand in manageable piles between the rails and rake it roughly even, slightly above the rail tops. The sand should be moist but not saturated. Dry sand slides and shifts under the straightedge. Saturated sand clumps, resists leveling, and can slump after screeding.
If you are screeding on a hot Sarasota afternoon and the sand is bone dry from sitting in the sun, a light misting with a garden hose brings it to the right consistency. Stop well before the sand pools or glistens with standing water.
Work in sections. Only spread sand for the area you can screed and cover with pavers before stopping for the day or before weather changes. Sand left exposed overnight or through a summer rain shower is sand you will re-screed.
Quantity reference: for a 1-inch bed, multiply your paved area in square feet by 0.00309 to get cubic yards. A 300-square-foot patio needs about 0.93 cubic yards, so round up to 1 cubic yard and add 10 to 15 percent for waste and rail-groove fill.
Step 3: Pull the Straightedge Across the Rails
Set the board across both rails and draw it toward you in a steady, controlled motion. Keep the board in full contact with both rails at all times. A slight side-to-side sawing motion as you pull helps the sand settle behind the board rather than mounding up in front of it.
If you hit a low spot where the sand pulls away and leaves a void, add sand with a trowel and re-pull that section. If the board rides up over a bump, there is too much sand or a piece of debris underneath. Scrape back and re-pull.
The goal: a smooth, uniform plane with both rails just visible at the surface. No ridges, no waves, no footprints.
Body position matters. Keep your back straight, grip the board at both ends, and use your legs to walk backward as you pull. On a 300-square-foot patio, you will make dozens of passes. Hunching over and pulling with your arms alone will put you in pain by the second section.
Step 4: Remove the Rails and Fill the Grooves
Lift each rail straight up and out. Do not slide it sideways. Dragging a rail laterally pulls sand into the channel and disturbs the screeded surface on both sides. Fill the groove with the same bedding sand using a hand trowel or magnesium float, leveling it flush with the surrounding plane.
This hand-finishing step takes patience, but every unfilled or overfilled groove will show in the finished paver surface as a ridge or a dip.
For areas wider than one rail span, use a leapfrog method. After screeding the first band, remove the rail closest to the unscreeded area and reposition it at the far edge of the next band. The previously screeded surface becomes your reference on one side, and the repositioned rail sets the grade on the other. This lets you cover a 20-foot-wide area in three bands without losing grade continuity.
Step 5: Lay Pavers on the Screeded Bed
Do not walk on the screeded sand. Do not let foot traffic, pets, or debris touch it. Begin placing pavers from an established edge, standing on pavers already laid and reaching forward onto the exposed bed. As you set each paver, your controlled pressure starts seating it into the sand, which is exactly what the system is designed to do.
If the area is too large to screed and pave in a single session, only screed what you can cover with pavers before stopping. We typically screed in 6-to-8-foot-wide bands (one rail span) and pave each band before setting up the next.
After all pavers are placed and edge restraints are secured, spread joint sand, sweep it into the paver joints, and compact the surface with a plate compactor (using a protective pad on the plate for textured or tumbled pavers). The compaction seats the pavers into the bedding sand and locks the joints together. This is when the roughly 1/4 inch of bed compression occurs, already accounted for in your elevation planning from Step 1.
Every step above assumes drainage slope is built into the rail placement. Here is how to calculate that slope for Sarasota conditions.
Building Drainage Slope Into the Screed
Sarasota’s rainy season drops 7 to 9 inches of rain per month from June through September. A dead-flat patio does not just hold water. It grows algae, gets slippery, and allows moisture to seep back into the sand bed, softening it from beneath.
The standard drainage pitch for a residential patio is 1/8 to 1/4 inch per linear foot, directed away from the house toward a permeable area, swale, or drain. We aim for 1/4 inch per foot on most Sarasota patios and pool decks because our afternoon downpours overwhelm a shallower pitch quickly.
The calculation:
Total fall = pitch (inches per foot) x horizontal distance (feet)
Example: a patio extends 12 feet from the house wall to the yard edge. At 1/4 inch per foot, the outer edge should be 3 inches lower than the edge against the house (12 x 0.25 = 3).
Set your screed rails to reflect that drop. The rail nearest the house sits at the high elevation. The rail at the yard edge sits 3 inches lower. Your straightedge rides downhill on the rails, and the screeded sand follows the same plane. A string line stretched between stakes at each end makes it easy to verify the rail heights before spreading sand.
For areas that slope in two directions (a pool deck draining to a center gutter, or a patio with a diagonal fall), you need to screed in sections. Reset the rails for each slope plane and blend the transitions by hand. Compound slopes around pool coping are one of the most common places we see DIY projects lose control. The tolerances are tight, the geometry is complex, and a half-inch error near the coping shows immediately as a lip or a puddle.
Rectangular patios with a single-direction slope are the simplest case. Curves and irregular shapes take a different approach.
Screeding Curves and Irregular Shapes
Most screeding tutorials assume a rectangle. Real hardscapes in Sarasota rarely cooperate. Pool decks wrap around freeform pools. Walkways curve through landscaping beds. Fire pit seating areas form circles or arcs.
The rails-and-straightedge method still works for curves, with adjustments.
Use shorter rail segments. Instead of 10-foot straight runs, cut 3-to-4-foot sections and position them along the inside and outside of the curve, each set to the correct elevation for that point. Shorter rail segments approximate a curve more closely because the straight sections between endpoints are shorter. The difference between a smooth arc and a choppy one comes down to rail length.
Use a flexible straightedge for gentle curves. A thin piece of aluminum flat bar or a strip of 1/4-inch hardboard can flex to follow a broad radius while still resting on the rails. For tight radii under about 3 feet, a hand trowel and magnesium float are faster and more accurate than fighting a stiff board around a sharp turn.
For circular areas, work in pie-slice sections. Screed radial strips from the perimeter inward (or center outward), using short rails positioned at each sector’s elevation. Blend the transitions between sectors by hand, checking depth with a ruler as you go.
The rule for curves: never freehand the entire sand bed without guides, no matter how experienced you feel. Even a 3-foot rail segment keeps the depth honest in a way your eye alone cannot.
Shape adds complexity to the job. Florida’s weather adds urgency.
What to Do When Rain Interrupts the Job
If you have worked outdoors in Sarasota between June and October, you know what a 2:00 PM thunderstorm looks like: five minutes from clear sky to downpour. We plan every screeding day around the weather forecast, and we prepare for the forecast to be wrong.
If rain threatens before you have laid pavers on the screeded bed, cover the exposed sand with a tarp immediately. Weigh the edges with pavers or bricks. A tarp laid before the rain arrives saves the bed entirely.
If the rain reaches the sand first, the bed is compromised. Heavy drops crater the smooth surface. Standing water shifts the sand and can wash fines down into the base. Do not try to lay pavers on a waterlogged or pockmarked bed. Let the sand drain, dry back to a moist (not saturated, not bone-dry) state, and re-screed it. This might cost a few hours or a full day of drying time, depending on how hard the rain hit, but it costs far less than pulling up settled pavers six months from now.
Heat creates the opposite problem. On a 95-degree July afternoon with direct sun, screeded sand can dry to a loose, powdery state in 20 to 30 minutes. Pavers do not seat as firmly into bone-dry sand. If the surface is drying faster than you can place pavers, a quick pass with a garden-hose mister brings it back to working condition. Dampen it. Do not soak it.
The operating rule: lay pavers only on sand that is moist, smooth, and undisturbed. If any of those three conditions is missing, fix the sand first.
These field realities are exactly why screeding problems account for so many of the tear-outs we do. Here is what we find when we pull up paver jobs that failed.
Mistakes We Find on Failed Paver Jobs
We do not get called to fix patios where everything was done correctly. After more than twenty years of hardscape work in Sarasota, Bradenton, Venice, Nokomis, and Osprey, the same screeding failures keep repeating.
Too much sand over a bad base. This is number one. Someone finds a dip in the base, dumps 3 inches of sand over it instead of correcting the base, and within a season the patio has a sinking spot that holds water. The fix is always the same: pull the pavers, excavate, rebuild the base, then re-screed at a uniform 1 inch.
Wrong sand. We have pulled up patios bedded on fill sand, play sand, and in one memorable case, decomposed granite. Each holds too much moisture, packs inconsistently, or migrates into the aggregate base under load. The ASTM C33 gradation exists for exactly this reason.
Footprints in the screeded bed. Every bootprint is an uneven spot in the finished surface. We have peeled back pavers and found crew footprints perfectly preserved in the sand beneath, each one a wobble point underfoot.
No slope. A flat patio in Sarasota collects water, grows algae, and softens the bedding sand from above. We have removed patio pavers where the sand beneath was perpetually wet because there was zero pitch to move rainwater off the surface.
Screeding too far ahead of paving. An installer screeds the entire patio in one pass, takes a break, and by the time pavers go down, the wind has deposited leaves, the sun has dried the sand, and the first section screeded is in a completely different condition than the last. Screed in bands. Pave each band before moving on.
Every one of these failures is avoidable with the approach outlined in this guide: check the base, use the right sand, screed only what you can cover, build in slope, and protect the bed until pavers are on it.
If you are planning a paver project in Sarasota County and want to see what this process looks like on your specific site, soil, and grade, a free estimate lets our crew walk the area and point out details that photos and articles cannot show. Reach out before the rainy season puts your base and slope to the test.
Frequently Asked Questions
How thick should the bedding sand be under pavers?
The standard is a nominal 1 inch (25 mm) of loose, screeded sand. Some manufacturer guides allow a consistent 1 to 1.5 inches. The critical point is uniformity: thick pockets compress differently and cause settling. If you need more than 1.5 inches anywhere, correct the base instead of adding sand.
Can I use polymeric sand as bedding sand?
No. Polymeric sand is a jointing material designed to fill gaps between pavers after they are laid, then harden when activated with water. The bedding layer beneath pavers should be washed concrete sand meeting ASTM C33 gradation. These are two different products with two different purposes.
How much bedding sand do I need?
For a 1-inch bed, multiply your paved area in square feet by 0.00309 to get cubic yards. A 300-square-foot patio needs about 0.93 cubic yards, so round up to 1 cubic yard. Add 10 to 15 percent for waste and rail-groove fill. One cubic yard of sand weighs approximately 2,600 to 3,000 pounds depending on moisture content.
Do I compact the bedding sand before laying pavers?
No. Screed the loose sand to a uniform depth and place pavers directly on it. Compaction happens after pavers are set, joint sand is swept in, and the surface is plate-compacted as a system. The sand compresses roughly 1/4 inch during this final compaction step, which you account for when setting your rail elevations.
What if my base has small low spots after compaction?
Fill low spots with additional base material (crushed rock or limerock) and re-compact those areas until the surface meets the 3/8-inch-over-10-feet tolerance. Do not use extra bedding sand to fill base depressions. Sand under load does not behave like compacted aggregate.
Can I screed sand for permeable pavers the same way?
Permeable interlocking concrete pavement uses open-graded No. 8 stone as the bedding course, typically at a 2-inch depth, not sand. Sand would clog the drainage pathways that make the system function. The screeding technique is similar (rails and a straightedge), but the material and thickness are completely different. Follow the permeable system’s specific installation requirements.