You’re about to spend thousands on pavers. Before a single one gets laid, the crushed rock base underneath has to be right. Not close. Right. In Sarasota, where afternoon storms can dump two inches in an hour and fine sandy soil shifts under load, preparing base for pavers is the difference between a patio that holds for twenty years and one that buckles in two.
We’ve been installing pavers across Sarasota, Venice, Bradenton, Nokomis, and Osprey since 2000, with our own crew on every job. What follows is how we actually build a paver base, what happens when steps get skipped, and how to judge whether your project is set up to last.
Jump to:
Why Every Paver Problem Starts Below the Surface
A finished paver installation isn’t one thing. It’s a stack of layers, each doing a specific job:
- Subgrade (the native soil): carries the load of everything above it.
- Geotextile fabric (where needed): keeps soil from migrating into your aggregate.
- Crushed rock base: distributes weight across the subgrade and channels water.
- Bedding sand: a thin, screeded layer that lets pavers seat evenly.
- Pavers and filled joints: the surface you walk and drive on.
- Edge restraints: lock the field in place so pavers don’t creep outward.
Remove any one layer, or install it wrong, and the surface will tell you. Pavers rock underfoot. Joints open up. Water pools where it shouldn’t. CMHA’s technical guidance emphasizes that every element, from compaction to edge confinement, must work together for the pavement to perform.
The pavers on top are the least likely part to fail. When we get a call about sinking or shifting, the problem is almost always underneath.
What Sarasota Soil Does to a Paver Base
Florida tutorials rarely get specific about soil, and that’s where they lose you. “Sandy soil” is a broad label that doesn’t capture what we actually dig into across Sarasota County.
Most of our job sites sit on Myakka or EauGallie fine sand. Both are common across coastal southwest Florida. They drain reasonably well near the surface, but many properties have a hardpan or clay lens within 18 to 30 inches. That layer traps water. During wet season (June through September, when Sarasota averages over seven inches of rain per month), trapped water can turn a nicely compacted subgrade into a soft, unstable mess.
Here’s what that means for base preparation:
- Organic material matters more here than in drier climates. Decomposing root systems and humus pockets are everywhere in Florida yards. They compress unevenly and hold water. We strip them out completely before placing any aggregate.
- The water table can rise to within a foot of the surface in low-lying areas during peak rain. If your project sits in one of those spots, the base must account for seasonal saturation, not just today’s conditions.
- Clay lenses, even small ones, change the plan. A three-foot pocket of clay in an otherwise sandy lot will hold water while everything around it drains. We’ve seen pavers sink in a single rectangle matching the clay pocket underneath, with the rest of the patio perfectly flat.
No stock “dig 6 inches and fill with gravel” formula accounts for this. A solid base starts with understanding what’s in your ground.
How Deep to Excavate
This is the first question homeowners ask, and the honest answer is that one number doesn’t fit every project. Base depth depends on traffic, soil strength, and drainage conditions.
CMHA publishes ideal-condition minimum base depths: 4 inches for pedestrian areas, 6 inches for residential driveways, and 8 inches for parking lots and residential streets. Those assume good soil and drainage. Weak soil, poor drainage, or heavier traffic push those numbers higher.
| Project type | Crushed rock base (minimum) | Bedding sand | Paver thickness | Approx. total excavation |
|---|---|---|---|---|
| Walkway or patio | 4 to 6 in. | 1 in. | 2 3/8 in. | 7 to 9 in. |
| Driveway (passenger vehicles) | 6 to 10 in. | 1 in. | 3 1/8 in. | 10 to 14 in. |
| Driveway (delivery trucks, heavy loads) | 8 to 12+ in. | 1 in. | 3 1/8 in. | 12 to 16+ in. |
Notice that total excavation is not the same as base depth. You need room for the base, the bedding layer, and the paver itself, all calculated from your finished elevation down. If your finished surface needs to meet a door threshold or pool deck coping, measure from there backward.
In Sarasota, we often add 2 inches of base beyond the minimum on properties where we find soft spots, high organic content, or any sign of seasonal water. An extra 2 inches of crushed rock costs far less than tearing up pavers two years from now.
Set Drainage Slope First
If we could tattoo one rule on every homeowner’s mind before a paver project, it would be this: establish your drainage slope before you bring in a single load of aggregate.
CMHA’s minimum recommendation is 1.5% slope away from structures. We use 2% on most Sarasota projects because our summer rain does not trickle. It arrives fast and heavy. Belgard’s installation guide also specifies 2% toward a drainage feature.
What does 2% look like? Over a 12-foot patio, that’s roughly 2.9 inches of fall (12 feet x 12 inches x 0.02). Not something you eyeball. We set string lines at finished elevation before excavation begins, check the grade with a transit or laser level, and build that slope into every layer: the subgrade, the compacted base, and the bedding sand. If the slope isn’t in the subgrade, adding extra bedding sand on one side to compensate is a recipe for uneven settling.
Florida is flat. Many Sarasota lots have almost no natural grade. That means every inch of slope has to be engineered into the base, and the runoff has to go somewhere real: a swale, a drain, or a permeable area. Water that leaves the paver surface and pools against the house foundation defeats the purpose of the whole project.
Building the Base Layer by Layer
Stake the Layout and Mark Utilities
Before any digging, mark the exact footprint with stakes and string. Add 6 to 12 inches beyond the finished paver edge for edge restraints, working room, and base extension. Then call 811 for utility marking. It’s free, it’s required in Florida, and we’ve found irrigation lines and low-voltage cable in places nobody expected.
Excavate Down to Solid Ground
Excavate to the full calculated depth, measuring from your finished-elevation string lines. Remove all topsoil, roots, organic material, and any soil that feels spongy or pumps water under foot pressure. If the exposed subgrade moves when you walk on it, stop. Adding gravel over soft soil just buries the problem.
On Sarasota properties with mature oaks or ficus, root removal gets serious. Roots left in the subgrade decompose, create voids, and let pavers drop. We cut them clean and, where necessary, install root barriers at the edge of the excavation. If major roots from a protected tree cross the footprint, that’s a conversation to have before committing to the layout.
Lay Geotextile Where the Soil Needs It
Geotextile fabric goes between the subgrade and the crushed rock base. Its job is separation and filtration: it prevents soil from migrating upward into the aggregate under load and water movement. CMHA’s construction guidance identifies seasonally saturated conditions and clay or silty soils as situations where fabric is appropriate.
We don’t deal with freeze-thaw in Sarasota, but we absolutely have seasonal saturation. On any site where wet-season water tables rise close to the base, we lay non-woven geotextile across the full excavation floor with 12-inch overlaps at seams. It adds minimal cost and keeps your crushed rock from slowly disappearing into the sand below.
This is not the same as cheap weed-barrier fabric from the garden aisle. Engineering-grade geotextile is thicker, stronger, and designed for separation under repeated loading.
Spread and Compact Crushed Rock in Lifts
We use 3/4-inch crusher-run limestone (dense-graded aggregate) for conventional bases. The angular, irregular shapes of crushed stone lock together under compaction. Round pea gravel does not. That difference is fundamental: angular aggregate creates a rigid, interlocking matrix that distributes weight. Round stone rolls and shifts.
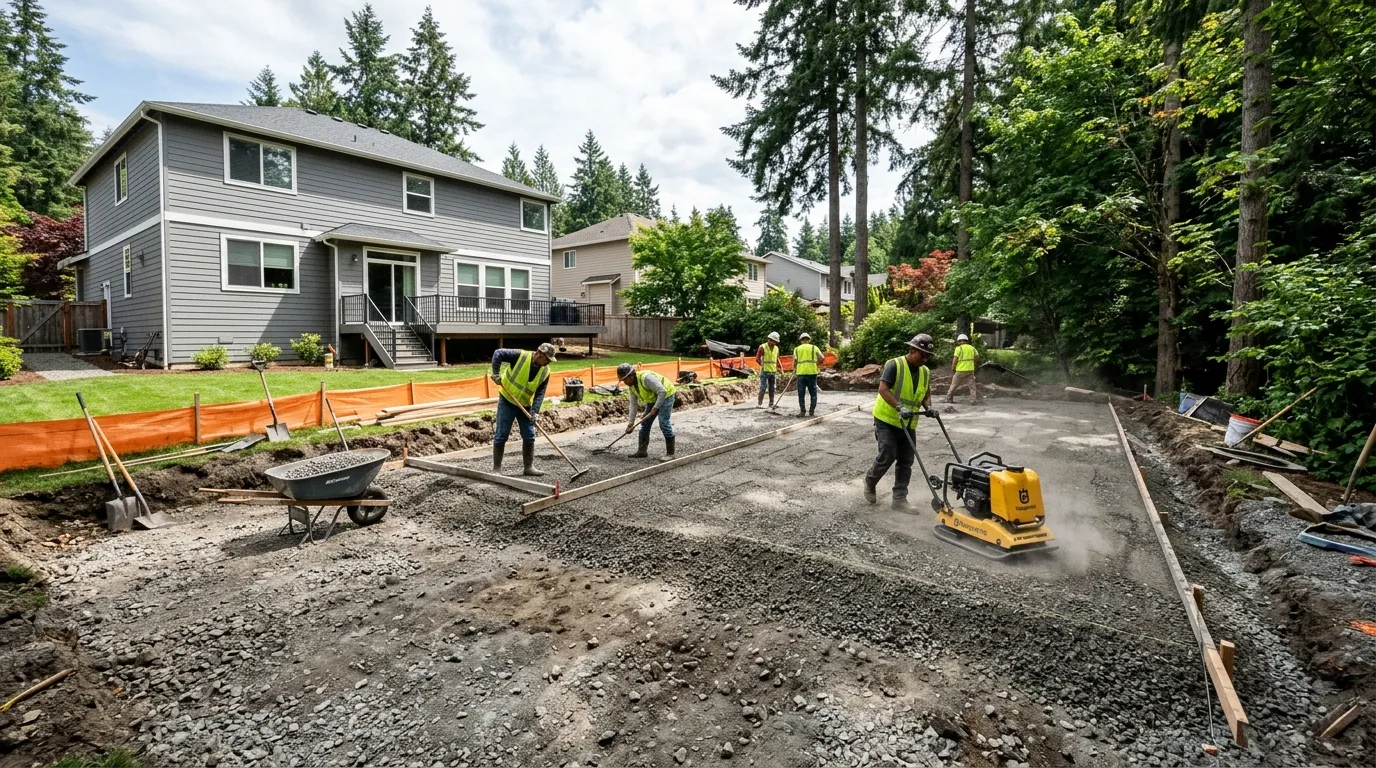
Spread the aggregate in lifts (individual layers), compact each one, then add the next. Lift thickness depends on your compactor:
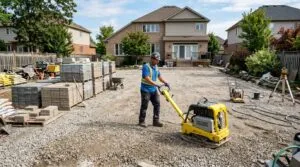
- A walk-behind plate compactor (3,000 to 5,000 lbf): compact in 2- to 3-inch lifts.
- A heavy reversible plate compactor (7,000+ lbf): 4- to 6-inch lifts are manageable.
If you rent a light plate and dump all 6 inches at once, you’ll compact the top 2 inches and leave the bottom loose. That loose layer is where settlement shows up months later.
Moisture helps. Lightly wet the aggregate before each pass. Bone-dry crushed rock doesn’t compact as tightly, and saturated rock won’t compact at all. Damp is the target.
Check Grade and Tolerance
After final compaction, check the base surface with a 10-foot straightedge. The industry standard is a maximum variation of 3/8 inch under that straightedge. If you find dips or humps beyond that, fix them with additional aggregate and re-compact. Do not fix them with bedding sand.
Also confirm that your drainage slope survived the compaction process. It’s common for the grade to shift slightly during compaction, especially at transitions. Recheck with your level and adjust before moving to bedding.
Screed the Bedding Sand
The bedding layer serves one purpose: giving pavers a uniform surface to seat into during final compaction. It is not a correction layer.
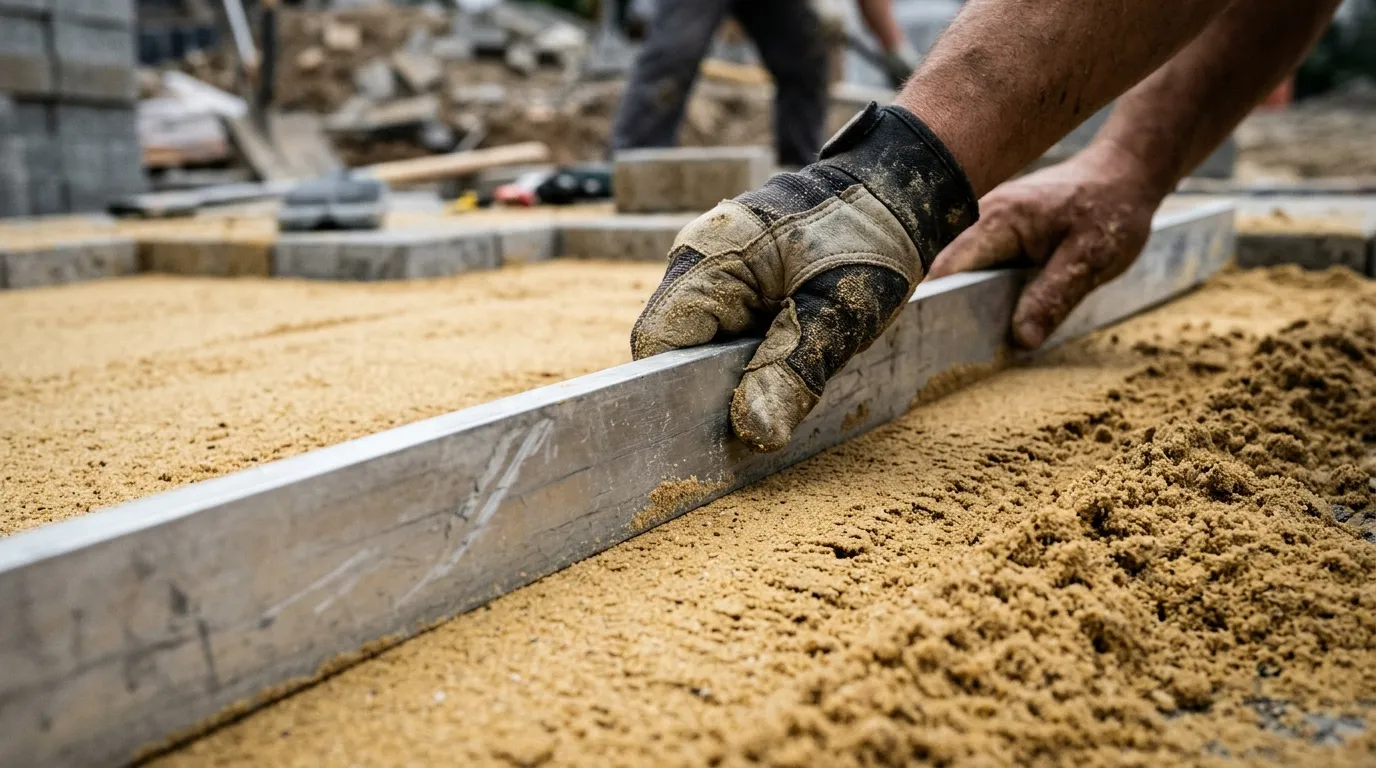
Use ASTM C33 concrete sand, screeded to a nominal 1 inch uncompacted. CMHA explicitly rejects masonry sand, limestone screenings, and stone dust as conventional bedding substitutes. Those materials hold water, migrate into the base, and don’t perform the same way under load.
Screed using two 1-inch pipes set on the compacted base as rails. Pull a straight board across them to create a flat, consistent surface. Remove the pipes and carefully fill the voids with sand. Do not walk on the screeded surface before laying pavers.
Only screed as much area as you can pave in the same session. Screeded sand left overnight in Sarasota can take an afternoon thunderstorm and lose its grade completely.
Compaction: The Step You Cannot Shortcut
Compaction is where DIY projects and cheap installs fall apart. A hand tamper on a 4-by-4-foot area does not generate the force needed to lock aggregate particles together. Understanding how to compact paver base correctly makes the difference between a base that holds and one that settles.
For reference, CMHA calls for at least 98% standard Proctor density on pedestrian and residential-driveway bases. That’s a laboratory-derived target measuring how tightly material particles are packed relative to their theoretical maximum. You don’t need to run a Proctor test on your backyard patio, but the implication stands: compaction has a measurable engineering standard, and a few taps with a hand tamper won’t reach it.
For most residential paver bases in Sarasota, a plate compactor in the 5,000-lbf range handles the job well. Driveways and areas expecting heavier loads call for a reversible plate with 7,000+ lbf of centrifugal force. Both are available at equipment rental yards throughout the Sarasota area.
Compact in overlapping passes, covering every square inch. Pay extra attention to edges, corners, and areas around drains or utility structures. These are the spots most likely to be missed, and they’re where settlement appears first.
After laying pavers and filling paver joints with polymeric sand, the surface itself gets a final compaction pass with a protective rubber pad on the plate to avoid scuffing. This seats the pavers into the bedding and drives joint material into place. Keep equipment like skid steers off newly laid pavers until that initial compaction and joint fill are complete.
Three Base Systems, Three Different Jobs
Not every paver base uses the same materials or structure. Here is an honest comparison of the three main approaches we work with in the Sarasota market.
Dense-Graded Aggregate Base (The Standard)
Crusher-run limestone compacted in lifts, topped with ASTM C33 bedding sand. This is what most conventional concrete paver and travertine paver installations use. It handles both pedestrian and vehicular loads when built to the right depth. The tradeoff is excavation volume and labor: moving and compacting 6 to 12 inches of rock takes time and equipment. For driveways, retaining walls, and any project bearing vehicle weight, this is still the go-to approach.
Open-Graded Aggregate Base
Open-graded aggregate (clear stone with no fines) drains faster and can be placed in wet conditions more easily. CMHA’s October 2025 guidance allows standard sand-set pavers over open-graded aggregate, but only for residential pedestrian projects. Not driveways. Not commercial areas. The known concern is that joint sand migrates into the voids in the stone over time, so joints need regular inspection and topping off when sand loss exceeds 1/2 inch.
For permeable paver systems designed to manage stormwater, the open-graded reservoir is part of an engineered design with specific aggregate sizes, subbase depths, and often underdrains. That’s a different system entirely from simply swapping dense-graded for clear stone because it seemed easier. A USGS field trial in Wisconsin found that roughly 65% of an interlocking-paver surface was essentially clogged after about a year under high-sediment conditions, though vacuum-assisted cleaning substantially restored infiltration. Permeable systems work, but they require maintenance access and a plan for sediment control.
Proprietary Panel Systems
Products like expanded-polypropylene panels are marketed as replacing several inches of aggregate. They reduce excavation and hauling, which saves time on tight-access sites. But the limits matter: current manufacturer data sheets restrict these systems to pedestrian applications only. No driveways. No heavy loads. Installation still requires excavated, compacted ground, geotextile, and a leveling layer.
Panels can make sense for a small backyard patio where access is difficult and hauling gravel is impractical. For a driveway or anything carrying vehicle weight, we use aggregate every time.
Base Failures We See on Repair Calls
We handle a fair amount of paver repair and re-leveling across Sarasota County. The patterns repeat.
No base at all. We’ve pulled up patios installed directly on compacted sand or, worse, directly on topsoil with a thin sand layer. These settle unevenly within the first rainy season. Every one of these jobs requires full excavation and a fresh start. There’s no patch for a missing base.
Wrong bedding material. Stone dust and mason sand look similar to ASTM C33 concrete sand. They are not the same. Stone dust holds water and turns to paste. Mason sand is too fine for consistent support. A well-documented case in Seattle showed a paver street failing within days because the bedding sand had excessive fines. Replacement with properly graded sand solved it. The pavers were fine. The sand was the failure.
No slope, or slope toward the house. We’ve seen multiple Sarasota pool decks where water drains toward the lanai instead of away from it. The base was flat or subtly crowned in the wrong direction. Correcting this means pulling up every paver, regrading the base, and reinstalling. Slope is not something you “sort of” get right.
Single-lift compaction on a deep base. The installer dumped 8 inches of rock and ran a light plate compactor over the top. The surface felt firm. Six months later, the bottom 4 inches settled and the pavers went with it. Compacting in lifts exists because the force has to reach the bottom of each layer.
Tree root invasion. Sarasota properties are full of mature live oaks, banyans, and palms. Roots follow moisture, and a paver base is a reliable water source. Without a root barrier or adequate clearance, roots push up through the base within a few years, lifting individual pavers and cracking edge restraints.
Frequently Asked Questions
Can I use play sand or mason sand for bedding?
No. The industry standard for conventional paver bedding is ASTM C33 concrete sand. Mason sand, limestone screenings, and stone dust hold water, create fines migration, and don’t support pavers consistently. Using the wrong sand is one of the most common and most preventable base failures we see.
Do I always need geotextile fabric under the base?
Not universally, but in Sarasota’s conditions we recommend it on most projects. Seasonally saturated sandy soil, clay lenses, and high water tables all create conditions where native soil migrates into aggregate over time. Engineering-grade non-woven geotextile prevents that. At its cost, it’s inexpensive insurance.
Can I skip the plate compactor and tamp by hand?
For anything larger than a few stepping stones, no. A hand tamper cannot generate the force needed for proper aggregate density. Rent a plate compactor with at least 3,000 to 5,000 lbf for patios, or 7,000+ lbf for driveways. The rental cost is a fraction of what re-leveling costs later.
How thick should the bedding sand layer be?
One inch uncompacted, screeded flat. Thicker bedding doesn’t improve the installation. Sand deeper than about 1.5 inches compresses unevenly and lets pavers shift under load. If you need more than 1 inch of sand to get a flat surface, the problem is in your base, not your bedding.
What if my yard has standing water after heavy rain?
That’s a drainage issue to solve before building a paver base, not something to bury under gravel. Identify where the water collects and why: high water table, clay hardpan, or poor yard grading. In some cases, a permeable paver system with a stone reservoir handles the water. In others, a French drain or regrading comes first. A site visit makes the difference between a guess and a plan.
Can panel base systems replace gravel for a driveway?
Not with current products. The major panel manufacturers specify pedestrian applications only. Their technical data sheets explicitly exclude vehicular loads. For any driveway, even a lightly used residential one, a properly designed and compacted aggregate base is the right call.
A paver base isn’t glamorous. Nobody posts photos of the gravel layer. But in 26 years of hardscape work across Sarasota County, we’ve never seen a well-built base fail, and we’ve never seen a bad base survive. If you’re planning a patio, driveway, or pool deck, a free estimate tells you exactly what your soil needs and what the base should look like before any pavers go down. Our crew can walk your property and point out what a photo can’t show. Reach out before the rainy season tests your base.