You finished the patio, activated the polymeric sand, and now something looks wrong. Maybe the paver faces are clouded with a white film. Maybe the joints are crumbling after a few seasons and weeds are pushing through. Either way, you searched “how to remove polymeric sand” and landed here because you need a fix that does not create a bigger problem.
We have pulled and replaced polymeric sand on patios, driveways, and pool decks across Sarasota for over twenty years. The single most common mistake we see is treating every polymeric sand problem as the same job. It is not. A thin haze on the paver face is a surface cleaning task. Failed joint sand that needs to come out is an extraction project. Confusing the two leads to unnecessary pressure washing, disturbed bedding sand, and a base that shifts under traffic.
This guide walks through both problems, with the specific methods, pressures, chemicals, and timing each one requires.
Jump to:
Identify What You Are Actually Removing
Before you rent a pressure washer or buy a gallon of cleaner, spend five minutes diagnosing. The white stuff on your pavers is not always the same material, and the wrong treatment can etch the surface or blow out your joints for no reason.
Polymeric sand haze is a thin residue left when excess sand was not fully swept or blown off the paver face before the water activated the binder. It tends to fade when you wet the surface and reappear as it dries. This is a surface problem. The joints underneath may be perfectly fine.
Efflorescence looks similar (white, chalky) but it is a mineral salt deposit that migrates from the paver or base material. It usually appears dry and does not disappear when wet. Gator’s Efflorescence Cleaner is formulated for this specific deposit, not for polymeric haze. Using an efflorescence cleaner on polymeric residue, or vice versa, wastes money and can stain the surface.
Failed joint sand is a structural issue. The polymeric sand has cracked, washed out, or grown mold deep in the joints. Here, you are not cleaning. You are excavating old material and replacing it.
A quick test: run a garden hose over a small section. If the white film vanishes while wet, you are likely dealing with haze. If the joints are soft, crumbling, or packed with roots, you need full removal. Once you know which problem you have, the method follows.
Removing Polymeric Sand Haze from Paver Surfaces
Timing changes everything
How long the haze has been sitting on the surface determines how aggressive your approach needs to be. Residue caught within the first hour (before the binder fully polymerizes) can often be removed with a leaf blower and a stiff nylon brush. Once it has cured for 24 hours or more, you are dealing with bonded polymer, and mechanical scrubbing alone will not cut it.
The gentle approach: hot water and a brush
SEK’s PolySweep technical data sheet recommends boiling water combined with agitation from a stiff-bristle brush for surface polymer and sand residue. This is the least aggressive starting point. Pour the hot water over a small test area, let it sit for a minute, then scrub. If the haze lifts, work in sections. If it does not, move to a chemical cleaner.
One caution: hot water on travertine pavers is generally safe, but combining heat with acidic chemicals on natural stone is not. Always test a hidden corner first.
Chemical cleaners designed for the job
Techniseal makes a Paver Restorer specifically labeled for haze created by some polymeric sands. Its technical data sheet calls for a dry, warm surface and a starting dilution of 1:8 for very light or very dark pavers. It also specifies waiting at least 30 days after installing new polymeric sand before applying the product. That 30-day window is product-specific, not a universal rule for every brand.
Techniseal also sells a Slurry Remover, but it is not interchangeable with the Paver Restorer. The Slurry Remover has a much shorter contact time (a few seconds, not minutes), a maximum working area of 50 square feet per application, and a narrower list of compatible substrates. Read the label for the product in your hand, not the one you saw in a YouTube video.
Vinegar comes up constantly in forum threads. It can work on light residue, but it can also dull concrete pavers and etch natural stone. If you would not pour vinegar on your kitchen countertop, do not pour it on your patio without testing first.
What not to do for surface haze
Do not aim a pressure washer at a haze problem. A contractor we know in Bradenton called us after a homeowner tried to blast haze off a six-month-old patio with 3,000 psi. The haze was gone. So was half the polymeric sand in the joints, and the bedding sand underneath had shifted enough to create lippage between pavers. Surface haze is a surface problem. Keep the solution on the surface.
Haze removal protects the paver face. But if your joints themselves are the issue (cracking, washing out, growing weeds), you need a different approach entirely.
Removing Old Polymeric Sand from Paver Joints
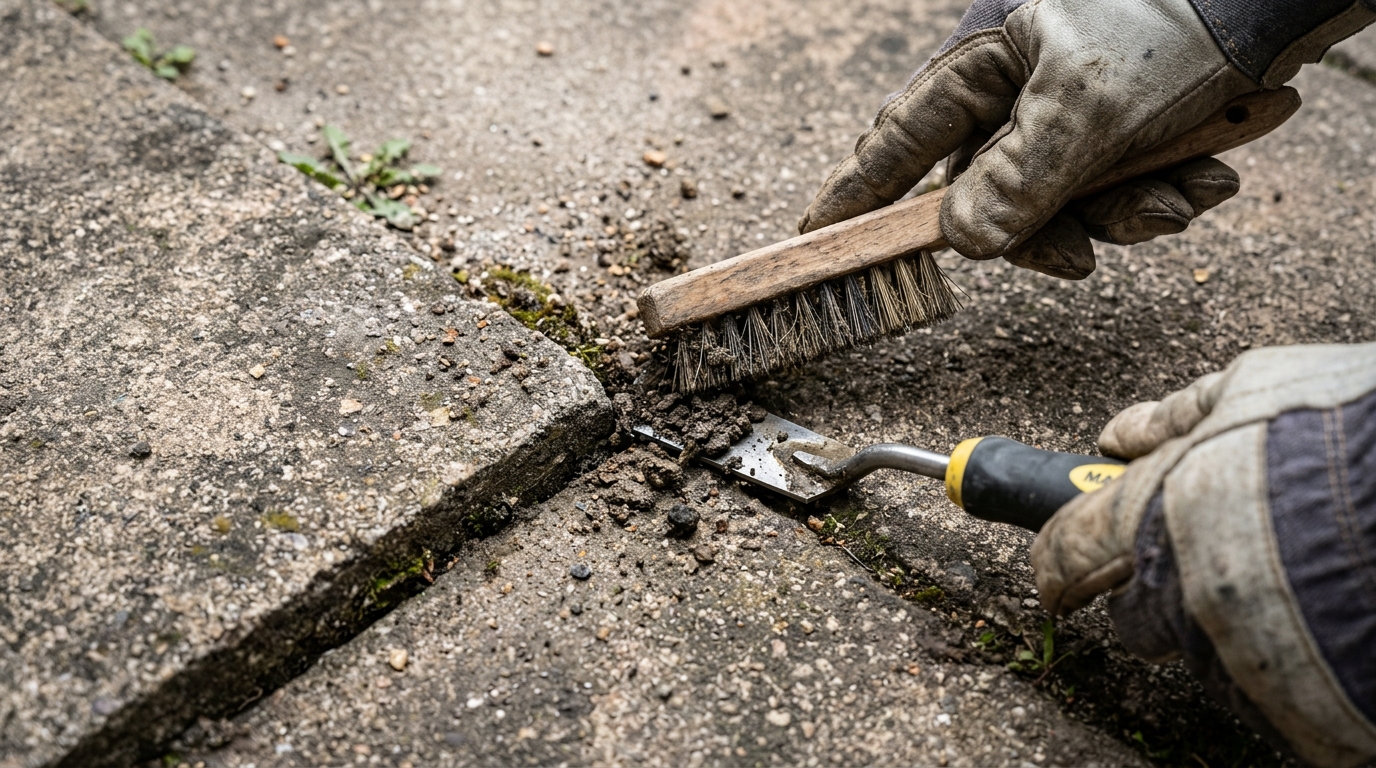
This is the harder job. You are not wiping a film off the top of a paver. You are pulling bonded material out of joints that may be 1 to 2.5 inches deep, without disturbing the bedding sand or shifting the pavers themselves.
Soak first, then extract
Polymeric sand softens when saturated. Techniseal’s restoration guide recommends soaking the area and letting water penetrate for several minutes before attempting any pressure washing. In Sarasota’s summer heat, the surface dries fast, so keep a hose running on the section you are about to work on.
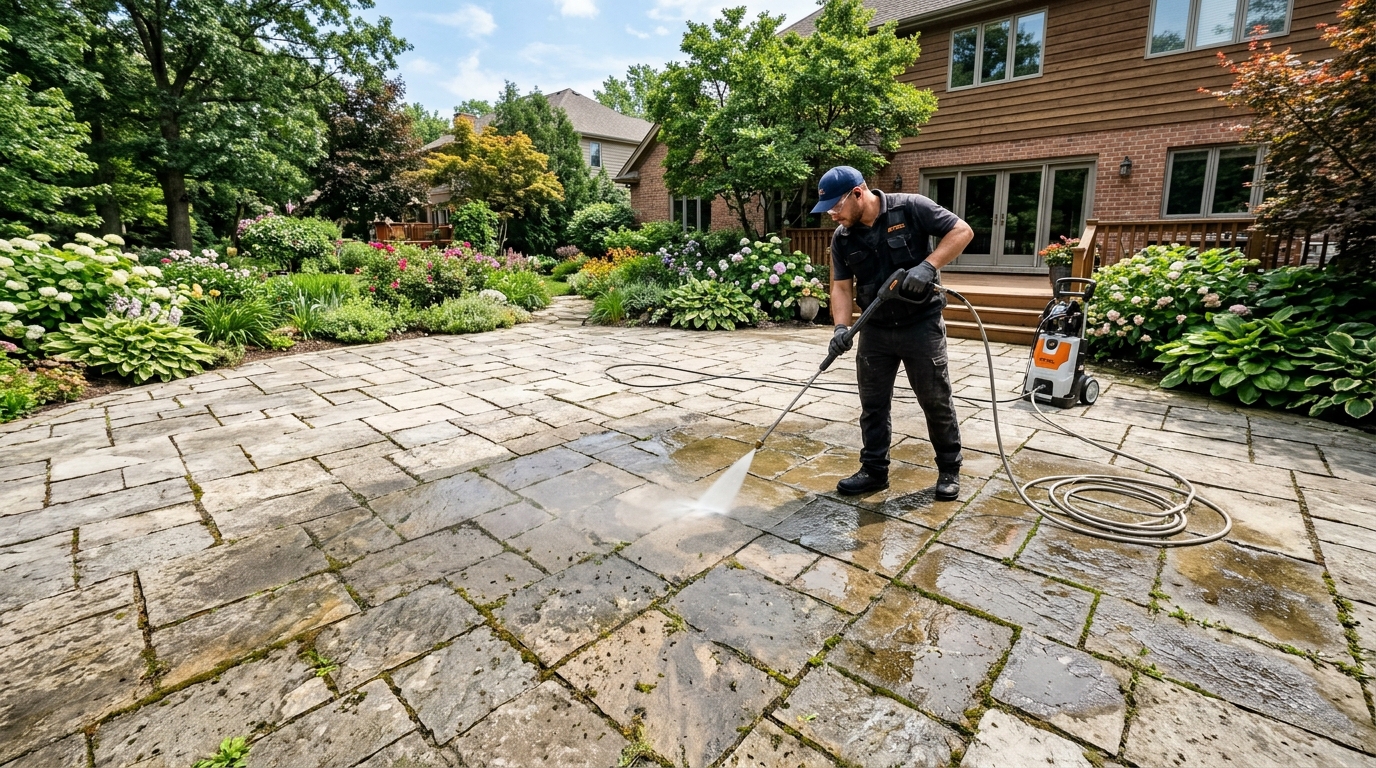
After soaking, a pressure washer with a fan tip (not a zero-degree nozzle) can begin loosening the old sand from the joints. Here is where published recommendations conflict. Techniseal’s restoration guide recommends 1,500 psi to reduce the risk of paver damage. Some trade sources recommend at least 2,000 psi for effective joint removal. This is not a typo or a rounding difference. It reflects a real tension between getting the old sand out efficiently and protecting the paver surface and bedding layer.
Our approach: start at 1,500 psi with a 25-degree fan tip, held at least 12 inches from the surface. If the sand is not releasing, increase pressure gradually. A zero-degree nozzle aimed into a joint at close range will blow through the polymeric sand, through the bedding sand, and into your crushed rock base. That is not removal. That is demolition.
Work in sections, not all at once
Extract one manageable area at a time (roughly 10 square feet), then move on. This prevents the entire patio from becoming a loose, saturated mess where pavers start shifting under your feet. After each section, use a wet-dry vacuum to pull out loosened material from the joints.
For stubborn spots where the polymeric sand has hardened like concrete (common in joints that have been baking in Florida sun for five or more years), a flathead screwdriver or a narrow cold chisel can break up the material before you wash it out. Tedious, yes. But it keeps the bedding layer intact.
Depth matters
You need to clear the old sand deep enough that the new fill can bond properly. Alliance Gator’s Super Sand G2 specifications call for the finished sand level to sit at least 1/8 inch below the paver top or chamfer. That means the joint needs to be clean well below that line so fresh sand has room to settle and compact. If you leave old residue at the bottom of the joint, the new sand sits too high and will not lock in. Calculating how much joint sand your project requires ensures you order the right amount for complete refilling.
Once the joints are clean and the area has dried for at least 24 hours (SEK’s recommendation before placing new sand), you can re-sand following the specific product’s installation instructions.
Getting the old sand out is half the battle. The other half is making sure the extraction did not wreck what sits underneath.
Protect Your Bedding Sand and Paver Base
This is the part almost nobody talks about online. Every pressure washer video shows the satisfying blast of old sand flying out of joints. What it does not show is what happens to the bedding layer underneath.
Your paver installation sits on a layered system: pavers on top, polymeric sand in the joints, a 1-inch bedding layer of coarse sand beneath the pavers, and a compacted crushed rock base (typically 6 to 8 inches deep in Sarasota’s sandy soil) below that. The bedding sand is what keeps each paver level and evenly supported, and proper screeding of that bedding layer is what prevents the voids that cause settlement. Rockwood’s installation manual warns that excessive pressure can damage both pavers and joint material, but the bedding sand is equally vulnerable.
When a high-pressure stream punches through a joint and hits the bedding layer, it creates a void. The paver above that void loses support. Under foot traffic or the weight of a parked car on a driveway, it settles unevenly. You started with a haze problem or a weed problem. Now you have a structural problem.
How to tell if you have gone too deep
After extracting old polymeric sand from a section, look straight down into the joint. You should see the bottom of the paver sides and, below them, clean bedding sand sitting flat and undisturbed. If you see a gap, a hole, or wet slurry where the bedding sand used to be level, you have breached the bedding layer.
The fix is not complicated, but it must happen before you re-sand. Add fresh coarse sand to the bedding voids, tamp it flat with a rubber mallet and a small board, and re-check the paver height against its neighbors. Skipping this step means your new polymeric sand fills a joint with an uneven bottom, which leads to premature cracking and washout within a season or two.
Florida’s soil makes this worse
Sarasota sits on fine sand with a high water table. During the rainy season (June through September), water finds every path downward. If your removal process loosened the bedding sand or created channels in the crushed rock base, rainwater will exploit those channels and erode the base from the inside. We have seen patios that looked fine in October start showing sunken pavers by the following March, all because the extraction was aggressive and the bedding was never repaired.
Base protection also depends on what you are standing on. The chemicals and pressure that work safely on one paver type can ruin another.
Different Pavers Need Different Removal Methods
Not every paver tolerates the same chemistry or the same water pressure. This is a gap in most removal guides, which tend to assume you are working with standard concrete pavers. In Sarasota, we install and maintain a wider range of surfaces.
Concrete pavers are the most forgiving for removal work. They handle moderate pressure (1,500 to 2,000 psi with a fan tip) and most commercial haze cleaners without damage. Acidic cleaners, including diluted vinegar, can dull the surface color over time, so test first and rinse thoroughly.
Brick pavers are porous. Chemical cleaners soak in deeper and take longer to rinse out. If you use a haze remover on brick, flood the surface with water before applying the product so the cleaner sits on top rather than penetrating the paver body. The 1:8 dilution Techniseal recommends for its Paver Restorer on very dark pavers is relevant here, since brick tends to be darker and more absorbent.
Travertine is calcium carbonate. Any acid-based cleaner (including vinegar, muriatic acid, and many efflorescence removers) will etch the surface and leave dull spots that are permanent unless you re-hone the stone. For travertine, stick to pH-neutral cleaners and mechanical methods. Hot water and a nylon brush are safer starting points than any chemical.
Porcelain pavers are dense and non-porous, which means haze sits on top rather than bonding into the surface. That sounds like good news, and it usually is: a stiff brush and hot water often handle haze on porcelain. But porcelain is also thinner than most concrete pavers (typically 3/4 inch vs. 2-3/8 inches), so aggressive pressure washing can chip edges or loosen units from the bedding layer more easily.
Knowing your paver material before you start is not optional. It determines every decision after it: which cleaner, which pressure, how much risk. And once you are running chemicals and a pressure washer, there is one more factor most guides skip entirely.
Contain the Debris and Wash Water
Pressure washing old polymeric sand generates runoff loaded with polymer fragments, loosened sand, and whatever chemical cleaner you applied. In Sarasota County, that runoff should not flow into storm drains, which discharge directly into Sarasota Bay and the Gulf.
Charlotte’s stormwater best management practices instruct pressure washers to plan collection and disposal, and not to discharge collected wash water into storm drains or public sewer manholes. While that is a Charlotte, North Carolina document, the principle applies wherever storm drains connect to waterways, which includes every neighborhood we work in.
Practical steps: use a berm or sandbag dam to contain the flow. Direct wash water onto a permeable landscaped area where it can filter through soil rather than running off impervious surfaces into the street. If you used a chemical cleaner, check the safety data sheet for disposal instructions. Most haze removers are mildly acidic and should be diluted and neutralized before they reach any planted area.
Dust is the other concern. Dry-brushing old polymeric sand generates fine silica particles. OSHA’s construction silica standard sets a permissible exposure limit of 50 micrograms per cubic meter as an 8-hour time-weighted average. That regulation targets employers, not homeowners, but silica dust does not care who inhaled it. Wet the material before brushing. Wear a dust mask rated for fine particulate (N95 or better). It takes two seconds to put on and prevents a problem you cannot undo.
When the Job Needs a Crew, Not a Rental
Some polymeric sand removal is straightforward. Light haze on a small patio, caught early, treated with hot water and a brush: a capable homeowner can handle that in an afternoon.
Full joint extraction on a large area is a different category. You are managing pressure, protecting the bedding layer, checking paver stability, cleaning joints to depth, and re-sanding with correct compaction and activation. On a 400-square-foot patio, that is a full day of physical work with rented equipment and a real chance of damaging the base if the pressure or angle slips.
The cost calculation is worth running honestly. A pressure washer rental runs $75 to $150 per day. A commercial haze cleaner costs $30 to $60 per gallon and covers roughly 40 square feet per gallon at proper dilution. New polymeric sand is $25 to $50 per 50-pound bag, and a typical patio joint system uses one bag per 30 to 50 square feet depending on joint width and depth. Add your time, and the gap between DIY cost and professional cost narrows faster than most people expect.
If your pavers have shifted, if the base is compromised, or if you are dealing with sealer applied over haze (a layered problem that requires stripping the sealer before you can even reach the residue), a crew with the right tools and twenty years of reading Sarasota soil will save you from a repair that costs more than the original installation.
A free estimate tells you exactly what your patio needs. Our crew can walk your patio and spot what a photo cannot show: bedding sand condition, base stability, and whether your joints need cleaning, extraction, or a full re-sand. Reach out before the rainy season tests your base.
Frequently Asked Questions
Can vinegar remove polymeric sand haze?
Diluted white vinegar can dissolve light polymeric residue on some concrete pavers, but it will etch travertine and can dull darker pavers over time. Always test a small, hidden area first. For natural stone, use a pH-neutral cleaner or hot water with a stiff brush instead.
How long should I wait before cleaning new polymeric sand?
Techniseal specifies a 30-day wait after installing new polymeric sand before applying its Paver Restorer or Slurry Remover. That interval is product-specific. Check the technical data sheet for your exact sand and cleaner combination, because other brands may differ.
Will a pressure washer damage my pavers?
It can, especially at high pressure or with a narrow nozzle. Start at 1,500 psi with a 25-degree fan tip held at least 12 inches from the surface. A zero-degree nozzle aimed into joints will blow through the polymeric sand and into the bedding layer, creating voids that cause pavers to settle unevenly.
Can I put new polymeric sand over old?
No. Layering new polymeric sand over deteriorated old sand prevents proper bonding and leads to premature failure. The old material needs to be removed and the joints cleaned to depth before new sand goes in. Manufacturer instructions consistently require clean, dry joints for a successful installation.
How do I tell polymeric sand haze from efflorescence?
Wet a small section with a hose. If the white film disappears while wet and returns as the surface dries, it is likely polymeric haze. Efflorescence tends to look dry and chalky whether the surface is wet or not. The distinction matters because the cleaners for each problem are different and not interchangeable.
What do I do with the wash water after removal?
Do not let it flow into storm drains. Contain the runoff with a berm or sandbags, and direct it onto a permeable landscaped area. If you used a chemical cleaner, check its safety data sheet for specific disposal instructions. Local stormwater rules apply, and in coastal Sarasota, storm drains connect directly to the bay.