Every paver installation guide mentions gravel. The problem is that the word covers at least three materials that behave differently under weight, water, and Florida’s afternoon downpours. We’ve pulled up patios in Sarasota where homeowners set concrete pavers straight on a bed of pea gravel, expecting the stones to lock in place. They didn’t. Rounded pebbles roll under load, and after one rainy season the surface was uneven enough to catch a chair leg.
Laying pavers on gravel works when you use the right aggregate, compact it properly, and build every layer in order. Below is what that means in practice: the types of stone, the base depths, the sand specs, and the drainage decisions that keep a patio or driveway flat in a climate that drops more than 50 inches of rain a year.
Jump to:
The Word “Gravel” Covers Three Different Materials
Before ordering aggregate, know which product the job calls for. Getting this wrong is the single fastest way to guarantee a paver failure.
Crushed angular aggregate is what belongs under standard pavers. Quarried and mechanically broken, its jagged edges lock together when compacted into a dense mass. Your supplier might label it ¾-minus, CR-6, or simply “road base.” CMHA explicitly advises against pea gravel, river rock, stone dust, and screenings for a conventional paver base because smooth or overly fine particles cannot form the interlocking structure that holds pavers in place.
Pea gravel and river rock are decorative materials. Smooth and rounded, they shift underfoot and will not compact into a stable foundation. If pea gravel is part of your plan, it belongs on top of or around pavers as a design element, not beneath them. It works fine as loose fill between widely spaced stepping stones in a garden path, where occasional movement is acceptable.
Open-graded stone (No. 57, No. 8) is clean, single-size aggregate designed for permeable paver systems. Its uniform particle size creates voids that store and drain stormwater. This is an engineered drainage layer, not a general-purpose base for interlocking concrete pavers.
The takeaway: when someone says “lay pavers on gravel,” the only gravel that functions as a structural base is compacted, angular, well-graded crushed rock.
The Full Cross-Section Under a Paver
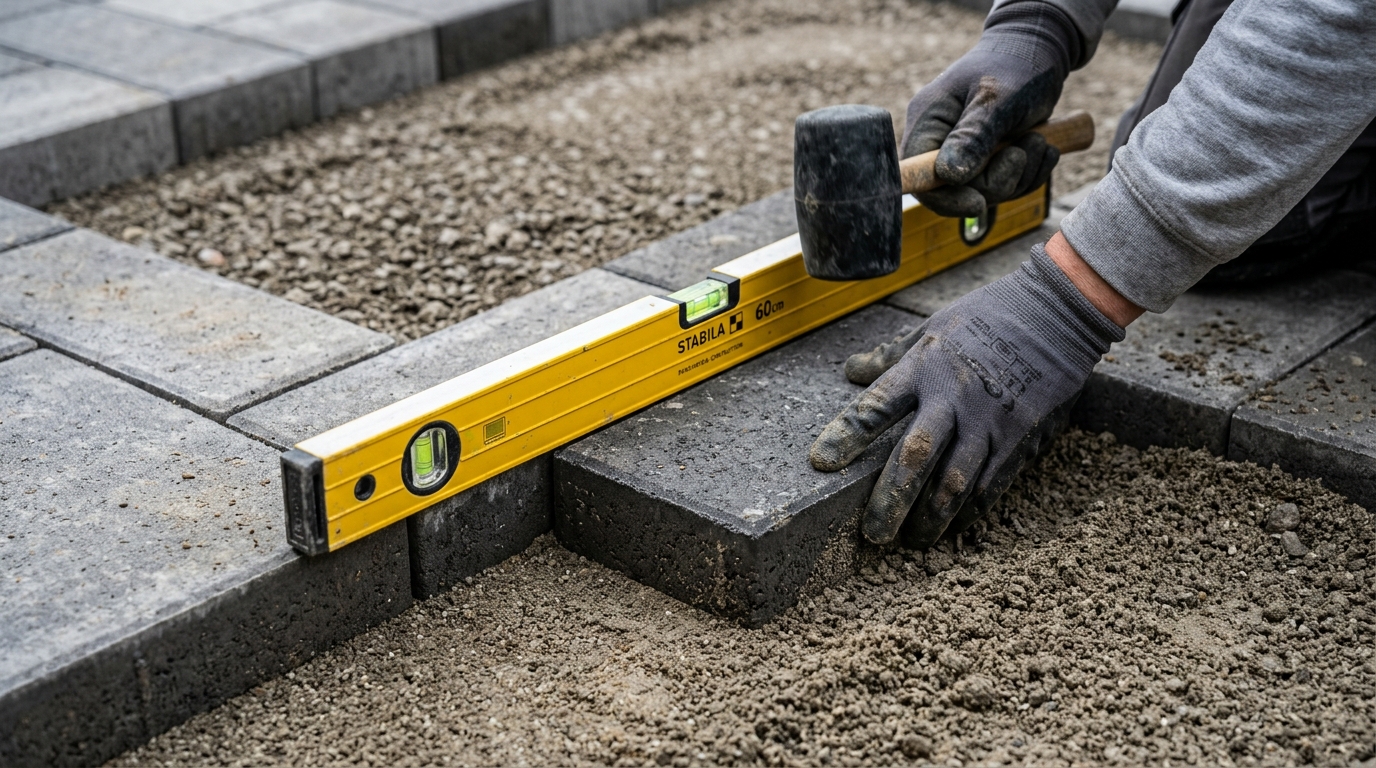
A paver on gravel is really a paver on a five-layer system. Each layer has one job. Skip a layer, and you transfer its job to a material not built to handle it.
| Layer (bottom to top) | Material | Typical thickness | Purpose |
|---|---|---|---|
| Subgrade | Native soil, graded and compacted | Existing ground | Supports everything above; must be compacted and sloped toward drainage |
| Geotextile (where needed) | Non-woven landscape fabric | Single layer | Prevents fine soil from migrating up into the aggregate base |
| Aggregate base | Compacted crushed angular rock | 4 to 6 in. (patios), 6 to 8 in. (driveways) | Distributes load, drains water, creates a stable platform |
| Bedding sand | ASTM C33 concrete sand | 1 in. nominal | Levels the surface for paver placement (not a structural layer) |
| Pavers and joint sand | Concrete, brick, or stone pavers with polymeric or fine joint sand | Paver thickness (usually 2⅜ in.) | Wearing surface; joint sand transfers load between units |
To calculate excavation depth, add the paver thickness, 1 inch of bedding sand, and your designed base depth. For a 6-inch base under a standard 2⅜-inch paver, that comes to roughly 9.5 inches of digging. Oregon State Extension’s paver installation guide uses this same addition method to help homeowners estimate excavation before breaking ground.
One detail we see people skip in Sarasota: the geotextile. Our fine sandy soil drains fast, which is an advantage. But those sand particles can migrate upward into crushed rock over time, especially where the water table is high. A sheet of non-woven fabric between subgrade and base costs almost nothing and prevents that migration for the life of the installation.
How Deep the Base Needs to Be
Base depth is not a single number. It depends on what the pavers carry and what soil they sit on.
CMHA’s application guide for interlocking concrete pavements provides these typical minimums for compacted aggregate:
- Walkways and patios: 4 to 6 inches
- Residential driveways: 6 to 8 inches
- Streets and heavy-traffic areas: 8 to 12 inches
Those ranges assume reasonably competent soil. Weak subgrade, poor drainage, or heavy loads push you toward the higher end.
In Sarasota and along the Gulf Coast, our native soil is mostly fine sand (Myakka series is common). Sand drains well, which helps clear water from the base after a storm. But sand compacts less firmly than clay or loam, so the subgrade work matters. We compact the excavated bottom with a plate compactor before adding a single grain of aggregate. Then we place base material in lifts of 4 to 6 inches and compact each lift independently. CMHA recommends reaching at least 98% Standard Proctor density for pedestrian areas and residential driveways.
For a typical Sarasota patio, we run a 6-inch compacted base. For a driveway handling daily car traffic, we go to 8 inches. That accounts for the sandy subgrade, the absence of freeze-thaw cycling (which means we skip the extra frost-depth padding northern states need), and the rain load that saturates the base repeatedly from June through September.
To estimate how much aggregate to order, multiply the patio area in square feet by the base depth in inches, then divide by 324. That gives cubic yards of compacted material. A 200-square-foot patio with a 6-inch base: about 3.7 cubic yards compacted. Order 10 to 15% more to account for the difference between loose delivery volume and compacted volume.
Building the Base and Laying Pavers Step by Step
This is the sequence we follow on every job. Some steps look simple on paper but absorb most of the time in the field.
1. Layout and excavation
Mark the paver area with stakes and string. Set the string at finished paver height and slope it away from any structure at a minimum of 1 inch per 4 feet. That slope moves surface water off the pavers and away from your home’s foundation.
Before digging, call 811 to have underground utilities marked. It’s free, it’s required, and hitting a water line 8 inches down is a setback no one plans for.
Excavate to the full calculated depth. Pile the spoil on a tarp, not on the lawn. Excavated sandy soil increases in volume once it’s loosened. On a 200-square-foot patio with 10 inches of cut, expect about 6 cubic yards of loose spoil to haul away. That number surprises people.
2. Subgrade preparation
Smooth the bottom of the excavation, verify the slope, and compact it. Lay geotextile fabric across the entire area, overlapping seams by at least 12 inches. In our sandy ground, this step is cheap insurance against long-term particle migration.
3. Aggregate base in compacted lifts
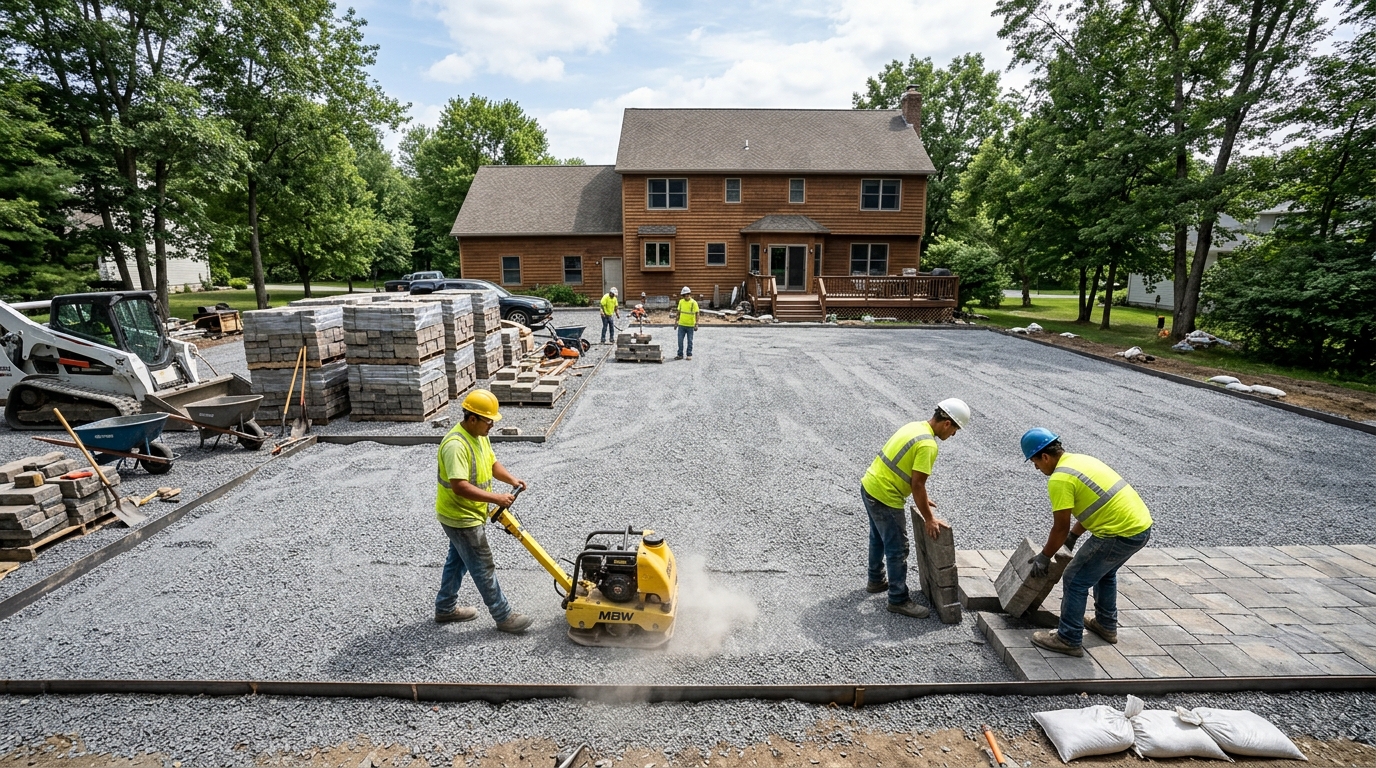
Spread crushed angular aggregate in lifts no thicker than 6 inches loose. Compact each lift with a plate compactor, making multiple passes in different directions. One pass is not enough to hit 98% compaction.
After compaction, check the surface with a 10-foot straightedge. It should be flat within 3/8 inch. If it isn’t, add material and compact again. A wavy base means a wavy patio, and no amount of bedding sand fixes a base problem.
4. Edge restraint
Install edge restraints before screeding bedding sand. Without rigid edges, the outermost pavers creep outward over time, joints open, and the perimeter unravels. We use heavy-duty plastic or aluminum edging spiked into the compacted base for patios, and poured concrete restraints for driveways.
5. Bedding sand
Screed a 1-inch layer of ASTM C33 concrete sand over the base. Use two pipes or metal rails set to height as guides, pull a straight board across them to level the sand, then carefully remove the rails and fill the voids. Do not walk on the screeded sand before placing pavers.
Bedding sand is a leveling course, not a correction layer. If the base has a 2-inch dip, fix the base. Piling extra sand into a low spot creates a soft pocket that will compress and settle.
6. Paver placement
Lay pavers in your chosen laying pattern, working from one corner outward. Stand on already-placed pavers, not on the screeded sand. Maintain tight joints (typically 1/8 inch for standard interlocking units). Cut border pieces with a wet saw for clean edges.
For driveways and vehicular areas, we use a 90-degree herringbone pattern. CMHA recommends herringbone under vehicle traffic because it provides the strongest mechanical interlock between paver units.
7. Compaction and joint sand
Run a plate compactor with at least 5,000 pounds of centrifugal force over the entire surface. This seats the pavers into the bedding and levels minor height differences. Sweep polymeric sand into the joints, compact again, sweep again, and repeat until the joints are completely full.
Polymeric sand contains a binding agent that hardens with moisture, locking joints against washout and weed growth. In Sarasota, where afternoon rain is nearly daily from June through September, polymeric sand pays for itself. Standard joint sand can wash out of paver joints within weeks of consistent storms.
8. Protect unfinished work
If you can’t finish in a day, cover exposed bedding sand with plastic sheeting before you leave the site. One afternoon thunderstorm can saturate and displace a screeded surface, forcing you to re-screed the next morning. We’ve been caught by this in Sarasota’s rainy season enough times to treat it as non-negotiable.
When Loose Gravel Belongs in the Design
Not every project needs a compacted crushed-rock base under every square foot. Two situations call for loose or open-graded stone on purpose.
Permeable interlocking concrete pavement (PICP) is a stormwater management system. Instead of a dense base, it uses clean open-graded stone (typically No. 57 for the reservoir base and No. 8 for the bedding) with wider joints filled with small aggregate. Water passes through the joints into the stone reservoir below, where it either infiltrates the native soil or drains to a controlled outlet. CMHA’s PICP construction guide details the full assembly, including underdrain options for sites where high water tables or clay layers limit infiltration.
This system matters in parts of Sarasota where lot coverage is high and stormwater permitting is strict. But PICP is an engineered system, not a shortcut to skip compaction. Sediment from adjacent landscaping or impervious surfaces can clog the stone joints over time. A peer-reviewed field study on a permeable parking lot documented declining infiltration rates along the pavement’s upgradient edge, where sediment-laden runoff from driving lanes collected. If you go the permeable route, plan for periodic cleaning and joint-stone replenishment from day one.
Decorative gravel borders are the other common use. Pea gravel or river rock set around or between widely spaced pavers creates an attractive, low-maintenance garden look. Here, the pavers serve as stepping surfaces, not a locked-together pavement, and the gravel is the visible finish. It works well for walkway accents where traffic is light. Just don’t confuse a decorative gravel path with a structural paver installation. They solve different problems and are built differently.
What to Watch After the First Rainy Season
A properly built paver surface should feel the same underfoot in October as it did when it was finished. Here’s what to check once the summer storms have tested it.
Joint sand loss is the most common issue in Florida, even with polymeric sand. Inspect the joints after the first few heavy rains. If the sand has dropped below the paver chamfer, sweep in additional polymeric sand, mist it lightly, and let it cure. Empty joints lead to paver movement and invite weeds.
Minor settling at edges usually means an edge restraint shifted or soil eroded behind the border. Catch it early. Once one edge paver drops, its neighbor follows.
Efflorescence (that white haze on new concrete pavers) is cosmetic, not structural. It’s calcium deposits drawn to the surface by moisture. In Sarasota’s humidity, it appears on nearly every new installation. It fades with time and weathering, or you can address it during your first paver cleaning.
Sealing is optional but worthwhile. A quality paver sealer protects color, reinforces polymeric sand in the joints, and resists staining from leaf tannins and organic debris. In Florida’s intense sun, cool touch pavers combined with sealing offer both temperature comfort and long-term protection. We recommend sealing 60 to 90 days after installation, once initial efflorescence has cleared, then resealing every 2 to 3 years depending on sun exposure and foot traffic.
The deeper concern is base failure, and it’s rare when the base is compacted correctly. Warning signs include pavers that rock when stepped on, visible sinking in a concentrated area, or water pooling where it didn’t used to. These point to a base or subgrade problem beneath the surface. Adding sand on top will not fix them. The affected section needs to come up so the base can be corrected and recompacted.
Frequently Asked Questions
Can I lay pavers directly on loose gravel?
Not if you want them to stay flat. Loose, rounded gravel like pea gravel does not compact into a stable mass. Standard concrete pavers need a compacted angular crushed-rock base, a 1-inch bedding sand layer, joint sand, and edge restraints. Without that structure, pavers shift under load and settle unevenly within months.
What type of gravel goes under pavers?
Compactable crushed angular aggregate, commonly sold as road base, ¾-minus, or CR-6. Avoid pea gravel, river rock, and stone dust. For permeable paver systems, use the specified open-graded stone (typically No. 57 for the base, No. 8 for bedding), which serves a drainage function and is part of a different assembly entirely.
How thick should the gravel base be for a patio?
CMHA’s typical minimum for walkways and patios is 4 to 6 inches of compacted aggregate, and 6 to 8 inches for residential driveways. Sandy or weak soil and poor drainage push the number higher. In Sarasota’s fine sandy ground, we use 6 inches as our standard patio base.
Do I need sand between the gravel base and the pavers?
Yes. A 1-inch bedding course of ASTM C33 concrete sand sits between the compacted base and the pavers. It creates a smooth, level surface for paver placement. Do not use mason sand, stone dust, or extra-thick sand to compensate for low spots in the base. Fix the base instead.
How much does a paver patio cost professionally?
Angi’s 2026 cost data estimates professional paver patio installation at $8 to $25 per square foot, with complex projects reaching $50 per square foot. A 280-square-foot patio averages around $3,800. Base depth, material type, site access, drainage, and pattern complexity all influence the final number, and if you’re wondering about scheduling, see how long to install a paver patio for real project timelines.
Will pavers on gravel shift over time?
Not when the base is compacted to spec, the joints stay filled, and edge restraints hold the perimeter. Most paver movement we see in Sarasota traces to one of three causes: insufficient compaction, missing or loose edge restraints, or joints that lost their sand after heavy rain. Maintenance is minimal, but it is not zero.
If you’re planning a paver patio or driveway in Sarasota, Venice, Bradenton, Nokomis, or Osprey, the base is where the project succeeds or fails. We’ve been building these foundations with our own crew since 2000, no subcontractors. A free estimate lets us walk your site, check the soil, and specify the right base depth before anything gets dug up. Reach out before the rainy season puts a new installation to the test.