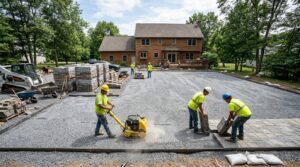
You’ve picked up samples, compared colors, maybe gotten a quote or two. The pavers themselves look straightforward: pick a shape, choose a color, lay them down. But paver installation is mostly about what you never see. The excavation depth. The crushed rock base. The bedding sand screeded to a precise thickness. The edge restraints holding everything in place. Those layers below the surface determine whether your driveway or patio holds up through a decade of Florida rain or starts settling after two wet seasons.
We’ve been installing pavers across Sarasota, Venice, Bradenton, Nokomis, and Osprey since 2000, with our own crew and no subcontractors. This guide covers the full process: what goes into a proper installation, the materials that work in our climate, what things cost, and the mistakes that cause pavers to fail. Whether you’re hiring a contractor or considering doing the work yourself, understanding what happens below the surface helps you ask the right questions and recognize the wrong shortcuts.
Jump to:
Paver Installation Is an Assembly, Not a Surface
The paver you walk on is about 2 3/8 inches thick. The system supporting it runs 8 to 12 inches deep, depending on the application. Thinking of paver installation as “laying stones” is like thinking of roofing as “attaching shingles.” The visible part matters. It’s also the smallest fraction of the work.
A proper paver installation is a layered assembly. From bottom to top:
- Compacted native soil (the subgrade) at the bottom of the excavation
- Geotextile fabric when soil conditions call for it, preventing fine particles from migrating into the aggregate base
- Crushed rock base, 4 to 8 inches thick depending on the application, providing structure and drainage
- One inch of screeded concrete sand (the bedding layer) that sets the pavers’ final elevation
- The pavers themselves, placed in a chosen laying pattern
- Polymeric sand or joint sand between the units, transferring load and resisting weed growth
- Edge restraints along every open border, preventing the field from shifting outward
Take any layer out and the system degrades. CMHA’s construction guidance for interlocking concrete pavements specifies each layer’s function and minimum requirements because they’ve documented what happens when one gets skipped or substituted. Thicken the sand to cover a wavy base, and you create soft spots that settle unevenly under weight. Skip the edge restraint, and perimeter pavers migrate outward within a year. Each layer solves a specific problem, and the problems don’t go away because you decided to save a step.
How Sarasota’s Climate Changes the Rules
Most paver installation guides address a national audience. They spend paragraphs on frost heave, freeze-thaw cycles, and deicing salt damage. In Sarasota, we don’t deal with those problems. We deal with different ones that generic guides barely mention.
Rain Volume and Intensity
Sarasota averages over 50 inches of rain per year. Most of it arrives between June and September, often dumping an inch or more in a single afternoon storm. A patio or driveway that can’t shed water fast enough will pool. Standing water accelerates joint sand washout, stains the surface, feeds algae, and drives efflorescence (those white mineral deposits that appear on new concrete pavers).
We slope every installation at minimum 1/4 inch per foot (roughly a 2% grade) away from the house. CMHA recommends at least 1.5% slope for conventional interlocking pavers. On pool decks, we also coordinate the slope with the coping edge and deck drains so water flows toward the drains rather than toward the pool or the foundation.
Sandy Soil
Most of Sarasota County sits on sandy subgrade. That’s an advantage for drainage because water moves through sand quickly. It’s a disadvantage for stability because sand shifts under load when it isn’t compacted properly. We compact the subgrade to at least 98% standard Proctor density (the ASTM D698 test standard) before placing any base material. If we hit organic soil, muck, or uncontrolled fill during excavation, it comes out. You cannot compact unstable material into a stable foundation.
Heat
Summer surface temperatures on dark pavers in direct sun can exceed 150°F. That matters for pool deck comfort (bare feet are the norm) and for paver sealer longevity. We recommend lighter-colored pavers around pools and apply sealers during cooler months or morning hours, when the product penetrates properly instead of skinning over on the hot surface.
High Water Table
Parts of Sarasota, especially near the bay and in low-lying neighborhoods around Phillippi Creek, have seasonal water tables within two to three feet of the surface. FHWA’s permeable pavement guidance discourages full-infiltration designs where groundwater sits less than 2 feet below the base. In those areas, we focus on surface drainage slope and may add a perforated drain line at the base layer to move water out mechanically rather than relying on the ground to absorb it.
The Full Installation Process, Step by Step
Here’s what happens on a typical residential paver job in our area. We’ve refined this process over more than two decades of working with Sarasota’s soil and weather. Every step exists because skipping it causes a specific, predictable problem later.
Layout and Utilities
Before moving dirt, we mark the project footprint and check for buried utilities: sprinkler lines, lighting wire, gas, cable. We shoot grades with a laser level. The finished surface elevation has to meet the house slab, garage floor, pool coping, or any existing hardscape at precisely the right height. Getting this wrong by half an inch creates a trip hazard at a door threshold or sends water toward the foundation.
We calculate material quantities at this stage: square footage of pavers (plus 5% to 10% for cuts, waste, and future repairs), cubic yards of base aggregate, bedding sand, and linear feet of edge restraint. On properties with significant grade changes, a retaining wall may be needed to create a level area before the paver work begins.
Excavation
We excavate to a depth that accommodates every layer of the assembly.
| Application | Base Depth | Bedding Sand | Paver Thickness | Total Excavation |
|---|---|---|---|---|
| Patio or walkway | 4 to 6 in. | 1 in. | 2 3/8 in. | ~7.5 to 9.5 in. |
| Residential driveway | 6 to 8 in. | 1 in. | 2 3/8 in. | ~9.5 to 11.5 in. |
That excavated soil goes somewhere. A 500-square-foot patio at 8 inches deep produces roughly 10 cubic yards of dirt: about five dump-trailer loads. Planning for removal is part of the job, not something to figure out after digging.
We grade the excavated subgrade to follow the finished drainage slope, then compact it with a plate compactor or vibratory roller until it’s firm and won’t deform under foot traffic.
Crushed Rock Base
We use crushed limestone or limerock (Florida DOT-approved) whose angular edges interlock under compaction. Round gravel or river rock doesn’t interlock. It shifts under load, and no amount of compaction changes that. If you’re wondering about laying pavers on gravel, the aggregate type is exactly why that choice matters for a stable result.
We place base material in lifts no more than 4 inches thick, compacting each lift before adding the next. A standard plate compactor’s effective reach maxes out around 4 inches of depth. Dumping 8 inches of aggregate and running the compactor once across the top leaves the lower half uncompacted. After each lift, we check grade. The base surface should mirror the planned finished slope. Any dip or hump in the base becomes a dip or hump in the finished pavers.
Bedding Sand
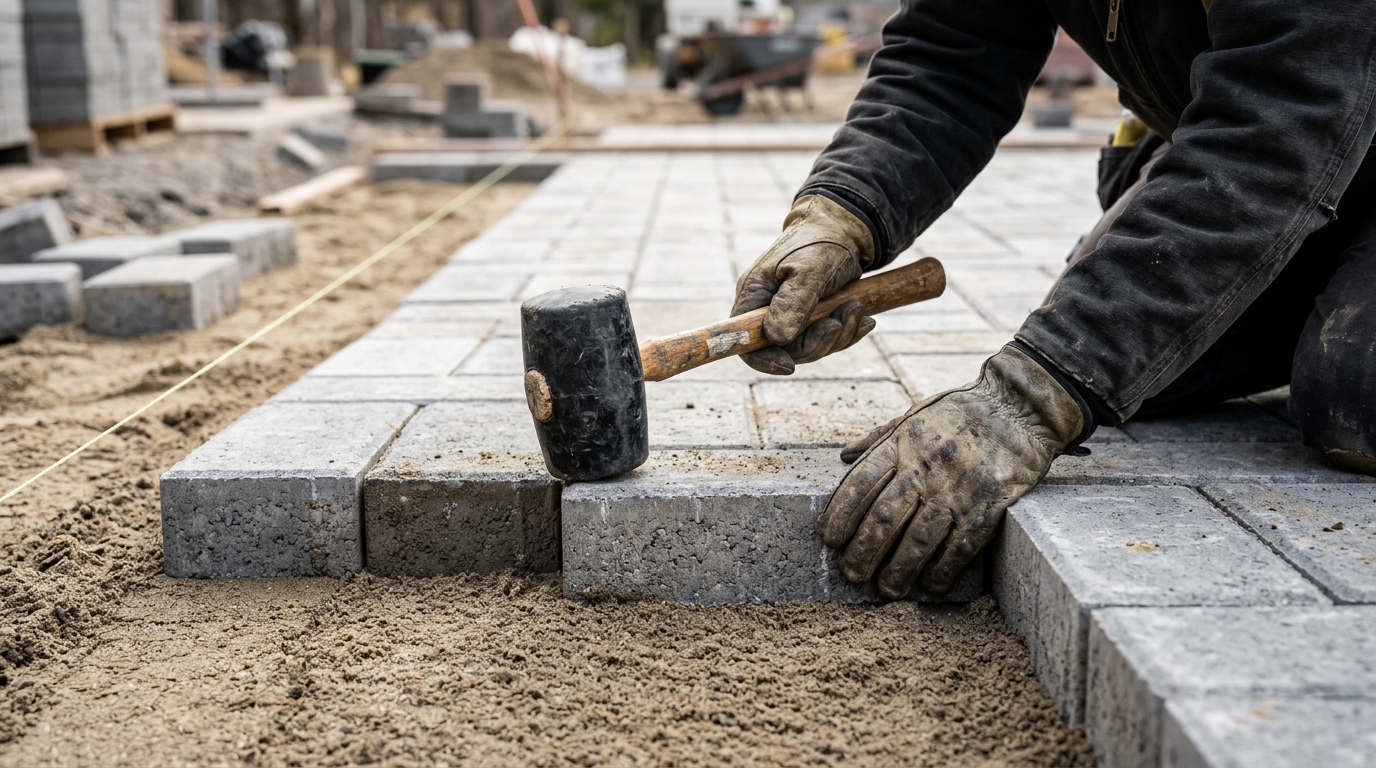
We screed exactly 1 inch of ASTM C33 concrete sand over the compacted base. Two screed rails set at the target height, sand spread between them, a straight board pulled along the rails. This produces a flat, consistent bedding surface at the correct elevation.
The bedding sand does not get compacted before laying pavers. It compresses when we plate-compact the pavers into it later. If you compact the sand beforehand, the pavers lose the embedment that locks them into the bedding.
This layer is not a correction tool. If the base has a 2-inch low spot, filling it with 3 inches of sand does not create a level surface. Thick sand pockets compress unevenly and cause settlement. Fix the base, not the bedding. One inch. Consistently.
Edge Restraints
We install rigid edge restraints along any border that isn’t against a fixed structure like a house foundation, pool wall, or existing curb. Aluminum or heavy-duty PVC paver edging, secured with 10-inch spikes driven through the base into the subgrade, holds the field locked in position.
Without edge restraints, the perimeter pavers creep outward. Traffic, thermal expansion, rain, and gravity are persistent forces. Within a year or two, joints widen, pavers shift, and the field loses its interlock. We’ve repaired enough installations missing proper edging to know this is not optional.
Laying the Pavers
We place pavers by hand, one at a time, set straight down onto the bedding sand. Sliding a paver into position displaces the sand underneath and creates unevenness. We work forward off the installed field, never stepping on the screeded sand ahead.
Pattern selection is decided before this stage. For driveways, we use a 90-degree herringbone because it resists lateral movement under tire loads better than any other common pattern. For patios and walkways, running bond, basketweave, or herringbone all perform well depending on the traffic, the paver shape, and the homeowner’s preference.
We lay a soldier course or sailor course along borders for a finished edge. Soldier means the paver’s long side faces the direction of travel. Sailor means the paver turns to show its broad face. Both create a clean border row that meets the edge restraint.
Cutting
Every paver installation involves cuts at borders, curves, and around obstacles. We use a wet-cutting masonry saw with continuous water on the blade. The water keeps the blade cool, extends its life, and suppresses respirable silica dust, which OSHA regulates with specific exposure controls for masonry cutting.
We cut pavers slightly oversized and fit them snug. Any cut piece smaller than one-third of a full paver tends to work loose over time, so we plan the starting layout to minimize small cuts along the borders.
Compaction and Joint Sand
Once all pavers and cuts are placed, we run a plate compactor with a rubber pad over the entire surface. This seats the pavers into the bedding sand, levels minor height differences, and initiates the mechanical interlock between units.
Then we sweep polymeric sand into the paver joints. Polymeric sand hardens when misted with water, resisting washout during heavy rain, blocking weed germination, and discouraging ant nesting. We compact again after the first sand application, add more sand to fill any joints that settled, and mist to activate the polymer.
Standard (unmodified) joint sand fills joints too, but it washes out faster in Florida’s heavy rains and requires more frequent replenishment. Polymeric sand costs more per bag but significantly reduces the maintenance cycle, which is why we use it on nearly every project.
Sealing
Sealing is technically optional, but in Sarasota’s climate we recommend it. A quality paver sealer protects against UV fading (significant with our sun intensity), reduces water absorption and staining from leaves, berries, and oil, locks in the polymeric sand, and enhances color in either a wet-look or matte finish.
We apply sealer at least 30 days after installation. That waiting period lets any initial efflorescence surface and get cleaned off before the sealer traps it underneath. Resealing every 2 to 3 years maintains the protection. We always seal in morning hours or on overcast days, never during peak afternoon heat, so the product penetrates instead of skinning over on the surface.
Choosing the Right Paver Material
Material affects more than color. It determines surface temperature, slip resistance, stain behavior, cutting difficulty, and long-term maintenance. Here’s what we see perform best across Sarasota’s conditions, and where each material has limits.
| Material | Best Applications | Watch Out For | Material Cost (per sq ft) |
|---|---|---|---|
| Concrete pavers | Driveways, patios, walkways. Widest range of shapes and colors. | Color fading without sealer. Efflorescence common in the first year. | $3 to $8 |
| Brick pavers | Traditional aesthetics. Patios and walkways. | Limited shapes. Can chip under heavy impact. | $4 to $10 |
| Travertine pavers | Pool decks (cool underfoot). Elegant patios. | Porous, needs sealing. Can etch from acidic pool water. | $5 to $12 |
| Porcelain pavers | Low-maintenance patios. Modern aesthetics. | Harder to cut. Can be slippery when wet unless textured. | $6 to $15 |
| Natural stone | Unique aesthetics. Feature areas and accents. | Variable thickness needs more bedding work. Higher cost. | $8 to $20+ |
For driveways, we lean toward thick concrete pavers in a herringbone pattern. They handle vehicle loads, resist cracking, and the color range is broad enough to match any house. For pool decks, travertine stays noticeably cooler than concrete in direct sun and has a natural grip when wet—and for areas where barefoot comfort is critical, cool touch pavers offer specialized heat-reduction technology. For patios and outdoor living areas with fire pits or seating walls, almost any material performs well when the base underneath is done right.
Laying Patterns Are Structural, Not Just Decorative
A 90-degree herringbone pattern distributes lateral forces from tire loads across a wider area than a running bond or stacked bond. That’s not a style preference. It’s engineering. For any surface that handles vehicle traffic, herringbone is the standard recommendation.
Other patterns serve different situations:
- Running bond (offset rows, like a brick wall) works well for walkways and patios with moderate foot traffic. Simple to lay and produces minimal waste.
- Basketweave creates a traditional look suited to courtyards and patios where loads are light and the visual rhythm matters.
- Stacked bond (a straight grid) looks clean and modern but provides the least interlock between units. We generally use it for accent bands or areas bounded by stronger patterns.
The paver shape itself limits your options. A standard 4×8 rectangular paver fits herringbone, running bond, and basketweave. Holland (square) pavers work in stacked or running bond. Irregular or tumbled shapes have their own layout logic. We walk through pattern choices during the estimate so the selection fits both the look and the structural demands of the project.
When Permeable Pavers Make Sense
Permeable pavers use wider joints filled with aggregate (small crushed stone, not sand) over an open-graded stone reservoir. Rainwater enters through the joints, fills the reservoir below, and either infiltrates into the soil or drains through a pipe system connected to a stormwater outlet.
They’re worth considering when stormwater management is part of the project goal: meeting local drainage requirements, reducing runoff to the street, or managing water on a property where grading options are limited. FHWA’s technical guidance on permeable interlocking concrete pavement describes infiltration, underdrained, and lined configurations, each suited to different soil and groundwater conditions.
The reservoir underneath does the real work. The pavers are just the lid. A permeable installation requires an engineered stone subbase designed for both storage volume and structural support, which makes it a different and typically more expensive project than conventional paver installation.
Maintenance matters more with permeable systems. Sediment clogs the aggregate-filled joints over time and gradually reduces infiltration capacity. Researchers studying a permeable parking lot at Fort Riley, Kansas, documented clogging progressing across the pavement as runoff carried sediment into the openings. Regular vacuum sweeping and joint aggregate replenishment keeps the system functional. Without that maintenance commitment, permeable pavers lose their drainage advantage within a few years.
What Paver Installation Costs in 2026
National cost guides give a starting range. Your actual quote depends on excavation conditions, base depth, material choice, project complexity, access, and disposal requirements.
| Project Type | Typical Installed Range | Source |
|---|---|---|
| Paver patio | $8 to $25 per sq ft | Angi, 2026 |
| Paver driveway | $10 to $30 per sq ft | Angi, 2026 |
| Plain concrete driveway (for comparison) | $6 to $15 per sq ft | HomeGuide |
A 400-square-foot patio at the typical range runs $3,200 to $10,000 installed. A 600-square-foot driveway at $10 to $30 per square foot lands between $6,000 and $18,000. The spread is wide because the work underneath varies: a stable, well-drained lot with easy truck access costs less to prepare than a sloped property with poor soil, limited access, and an old concrete slab that needs demolition and hauling.
When comparing quotes, check that each one covers the same scope: demolition (if applicable), excavation, hauling and disposal, base material and compaction, bedding sand, pavers, polymeric sand, edge restraints, and site cleanup. A quote that looks $3 per square foot cheaper might be missing base depth, using a thinner material, or leaving you to arrange your own disposal. The cheapest bid and the best installation are rarely the same quote.
Why Pavers Fail and How to Prevent It
We repair other people’s paver work regularly. The failures almost always trace back to the same handful of causes, and none of them involve the paver itself crumbling.
Settlement and Unevenness
This is the most common failure we see. Pavers sink in spots, creating low areas that collect water and trip hazards at transitions. It happens when the base wasn’t compacted in proper lifts, when organic material was left in the subgrade, or when too much bedding sand was used to hide an uneven base. The fix is to remove the affected pavers, correct the base, rescreed the sand at 1 inch, and reinstall. There’s no shortcut that avoids pulling pavers up.
Edge Creep
Pavers along the border slowly shift outward, opening gaps and loosening the interior field. The cause is almost always missing or undersized edge restraints, or restraints that were spiked into loose fill instead of stable subgrade. Proper restraints with 10-inch spikes into compacted ground solve this permanently.
Weed Growth and Ant Nests
Weeds push up through paver joints. Ants build mounds that displace joint sand and undermine the bedding. Both happen when joint sand has washed out or was never properly consolidated. Polymeric sand, filled completely and activated correctly, prevents most weed and ant issues. Even polymeric sand degrades over years, though, and may need partial replenishment in heavily weathered joints.
Efflorescence
A white, powdery film on the paver surface that worries homeowners. It’s calcium deposits leaching from the concrete and crystallizing as moisture evaporates, and it’s most pronounced in the first year after installation. The right approach is to let it appear, clean it with an appropriate efflorescence cleaner, and then seal. CMHA’s maintenance guidance covers cleaning approaches and warns against sealing over active efflorescence, which traps the deposits under the sealer and creates a bigger problem.
Water Pooling
Standing water after every rain means the slope is insufficient, the base has settled in low spots, or the drainage plan didn’t account for where water goes after it leaves the paver surface. We maintain a minimum 2% grade and verify that the runoff path reaches a drain, swale, or permeable area. Checking grades with a level during construction is cheaper than regrading pavers after they’re in.
DIY vs. Professional: An Honest Comparison
A small patio on stable, flat ground with good access is a reasonable DIY project for someone willing to rent a plate compactor, buy or borrow a wet saw, and invest the physical labor. The materials are available at building supply stores. The knowledge is in guides like this one.
Where DIY gets risky:
- Driveways. Vehicle loads demand a deeper base, more aggregate, and precise compaction in controlled lifts. Under-compacting a driveway base shows up as tire ruts within the first year.
- Sloped or poorly drained sites. Getting the drainage grade right across a large area, especially when the surface has to meet existing structures at exact elevations, requires surveying tools and experience reading soil conditions.
- Large projects over 400 to 500 square feet. The volume of material is genuinely heavy. Five tons of base rock doesn’t arrive in convenient amounts. Screeding 600 square feet of sand to a consistent 1-inch depth, without walking on it, takes practice most people don’t have.
- Complex layouts with curves and multiple cut lines. Fitting pavers around radii, circles, and irregular borders involves dozens of precise cuts that directly affect the finished appearance.
The most expensive DIY mistake isn’t a bad cut or a crooked row. Those are fixable in place. The expensive mistake is an inadequate base that looks fine on day one and fails after the rainy season, when the sand has been placed, the pavers laid, and the polymeric sand activated. At that point, the only real fix is removing everything down to the subgrade and starting over.
Maintaining Your Pavers After Installation
Pavers are low-maintenance. They are not no-maintenance. A basic routine keeps them looking and performing well for decades.
- Sweep or blow off debris regularly to prevent organic staining and buildup, especially under trees.
- Rinse with a garden hose after storms to clear residue. Avoid high-pressure washing on fresh polymeric sand for the first 30 days.
- Inspect paver joints once a year. If sand levels are dropping, weeds are appearing, or ants are mounding, replenish the polymeric sand before the problem spreads.
- Reseal every 2 to 3 years. Clean the surface thoroughly before each resealing application, and let the pavers dry completely.
- Address settlement early. One or two sunken pavers can be lifted, the bedding corrected, and the pavers reset. Ignore it and the low spot collects water that undermines adjacent pavers.
For permeable paver systems, add periodic vacuum sweeping to the schedule. Clogged joints lose infiltration capacity progressively. Catching sediment buildup early is far less expensive than restoring a fully clogged system.
Frequently Asked Questions
How long does paver installation take?
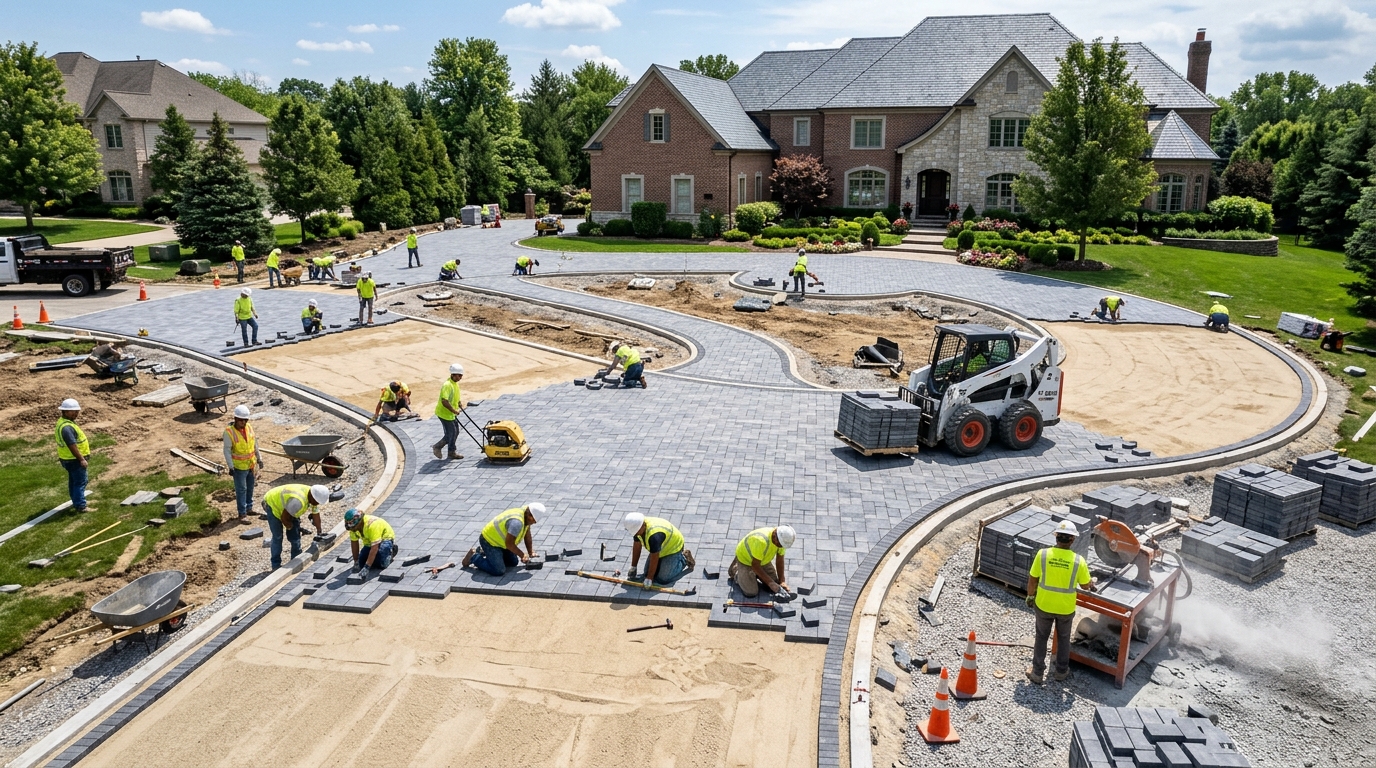
A typical 400- to 600-square-foot patio takes our crew 2 to 3 days from excavation through joint sand. Driveways and larger projects run 3 to 5 days. Demolition of an existing surface, unexpected soil conditions, or weather delays can extend the timeline. For a closer look at how long to install a paver patio, see our breakdown of real project timelines.
How deep should the base be for pavers?
For patios and walkways on stable soil, 4 to 6 inches of compacted crushed rock. For residential driveways, 6 to 8 inches. Weak soils, high water tables, or heavier vehicle loads may require more. These are CMHA-qualified starting points, not universal numbers.
Do I need a permit for paver installation in Sarasota?
Sarasota County generally does not require a permit for replacing an existing surface with pavers at the same elevation, or for patios that don’t alter drainage. New driveways, changes to impervious area, and work near wetlands or flood zones may trigger review. Check with your local building department before starting.
Can pavers be installed over existing concrete?
Sometimes. The concrete must be structurally sound, properly sloped, and at an elevation that allows paver thickness plus a thin setting bed without creating problems at thresholds or property lines. Cracked, heaving, or poorly drained concrete should be removed. An overlay on bad concrete just puts a new surface over an old problem.
What is the difference between polymeric sand and regular joint sand?
Regular joint sand fills gaps but washes out in heavy rain and doesn’t resist weeds or insects. Polymeric sand contains a binding agent that hardens when activated with water, creating a firm joint that resists washout, weed growth, and ant nesting. In Florida’s rainy climate, polymeric sand significantly reduces joint maintenance over the life of the installation.
How long do pavers last?
With a proper base and routine maintenance, concrete and brick pavers commonly last 25 years or more. The pavers themselves rarely fail. The base, joints, and drainage are what degrade over time. Maintaining joint sand, resealing on schedule, and correcting minor settlement early extends the life of the entire assembly well beyond the paver material alone.
If you’re planning a paver project in Sarasota, Venice, Bradenton, Nokomis, or Osprey, a free estimate lets us look at your specific soil, drainage, and layout and give you an honest scope and price. Our crew can walk your property and point out what a photo can’t show. Reach out before the rainy season tests your base.