When it comes to hardscape installation, every detail defines the overall success of a project. Among them, knowing how to lay paver edgers is a highlight – because it’s often the aesthetic touch that rounds up the envisioned outdoor design.
You see, paver edgers are not only functional – in other words, providing support and structure to your paved areas – but they also elevate the aesthetic appeal of walkways, patios, and driveways. If you’ve ever wondered how to lay paver edgers effectively and professionally, this guide is here to demystify the process.
We will walk you through the essentials – including the tools you’ll need, how to prepare the ground, and the techniques for a seamless installation. Whether you’re an experienced DIY enthusiast or embarking on your first landscaping project, understanding the nuances of laying paver edgers will help you achieve a polished, long-lasting finish.
Jump to:
How to lay paver edgers

Paver edgers are more than decorative borders; they are the unsung heroes of any hardscape design. They keep pavers in place, preventing shifting and erosion caused by weather or foot traffic.
Without proper edging, even the most meticulously laid pavers can lose their structure over time, leading to uneven surfaces and a compromised design. Well-installed edgers also serve to define the boundaries of your project, creating a clean and much more professional look.
Laying paver edgers correctly ensures that your hardscape looks good and stands the test of time. To achieve this, attention to detail during the planning and installation phases is essential.
Step 1: Gather the Right Tools and Materials
Before beginning any hardscape project, preparation is key. For laying paver edgers, you’ll need the following tools and materials:
- Paver Edgers: Choose a style and material that complements your existing design. Options include concrete, brick, or stone.
- Base Materials: Crushed stone and sand are essential for creating a stable foundation.
- Edging Restraints: Plastic or metal edging restraints are sometimes used to secure the borders.
- Tools: Shovel, rake, mallet, level, tape measure, and tamper.
- Paver Saw or Chisel: For cutting pavers to fit curves or tight spaces.
- Landscape Fabric: Helps to prevent weeds from growing under the pavers.
- Safety Gear: Gloves, safety goggles, and knee pads for protection.
By having everything on hand before you start, you can avoid interruptions and focus on the task at hand.
Step 2: Plan and Prepare the Site
Successful hardscaping begins with thoughtful planning, so begin by outlining the area where the paver edgers will be installed, marking it with stakes and string. This helps create a clear visual of the project and ensures accurate measurements.
Next, excavate the area where the edgers will sit. Dig a trench that is approximately 6–8 inches deep and wide enough to accommodate both the paver edger and the base materials.
The depth may vary depending on the thickness of your paver edgers, but the goal is to ensure that they sit flush with or slightly above the surrounding ground level.
Compact the soil at the bottom of the trench using a hand tamper or mechanical compactor. This step prevents settling and provides a stable base for your installation.
Step 3: Lay the Base Layer
The base layer is the foundation of any hardscape project. Start by spreading a layer of crushed stone, approximately 4 inches (10.16 cm) deep, evenly across the trench. Use the tamper to compact the stone, ensuring a solid base that won’t shift over time.
Once the crushed stone is compacted, add a layer of coarse sand, about 1 inch (2.54 centimeters) thick. Level the sand using a screed or a piece of straight lumber – this layer acts as a cushion, making it easier to adjust the paver edgers during installation.
Step 4: Position and Align the Paver Edgers
With the base prepared, it’s time to lay the paver edgers. Start at one end of the trench and work your way to the other, placing each edger carefully into the sand layer. Use a mallet to gently tap each piece into place, ensuring a snug fit.
To maintain a straight line, use the string as a guide. If your design includes curves, take your time to arrange the edgers in a smooth, natural arc. For tight corners or curves, you may need to cut the pavers using a paver saw or chisel. Always measure and cut carefully to achieve a professional finish.

Step 5: Secure the Edgers
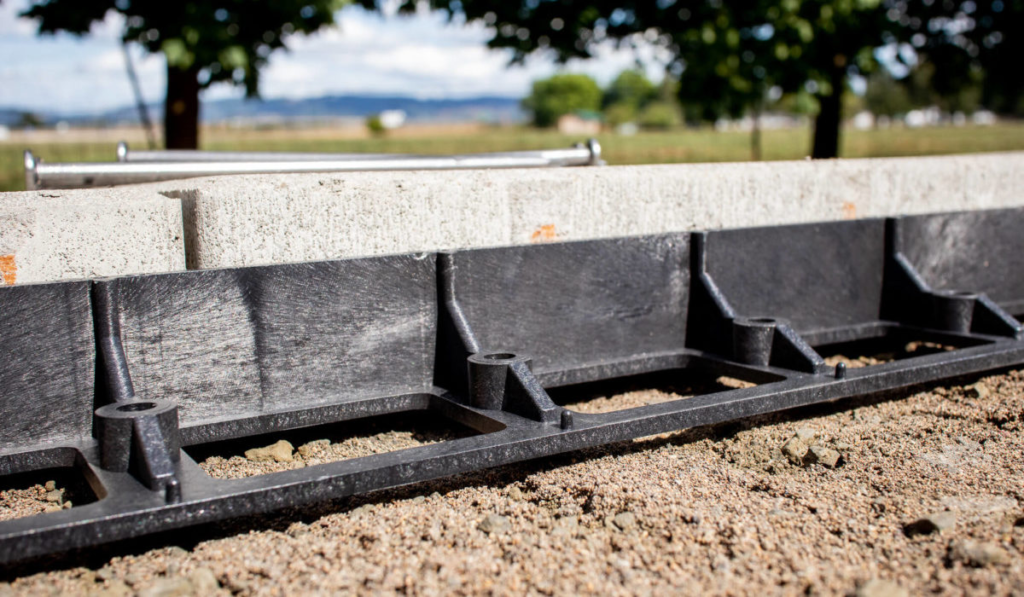
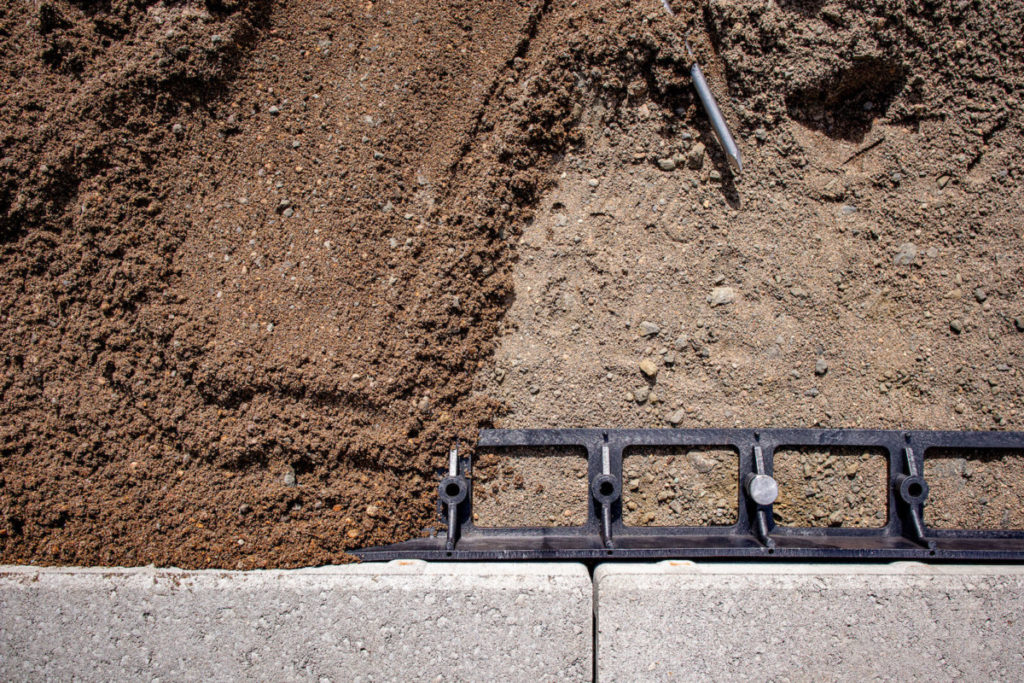
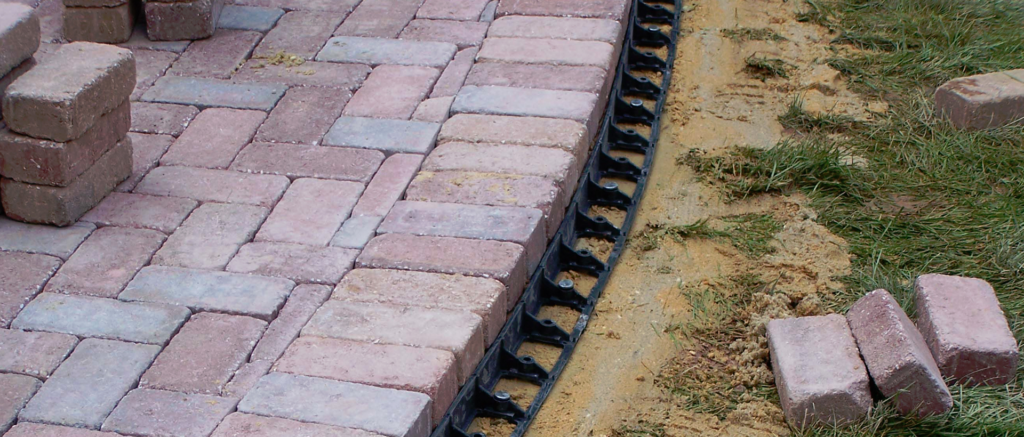
Once the edgers are in position, it’s time to secure them. If you’re using edging restraints, install them along the outer edge of the pavers, anchoring them into the ground with spikes. These restraints prevent movement and ensure the longevity of your installation.
For a more traditional approach, you can backfill the trench with soil or concrete. Gently compact the backfill material to hold the paver edgers in place while avoiding displacement.
Step 6: Final Touches and Maintenance Tips
After securing the edgers, inspect the installation for any unevenness. Adjust as necessary using the mallet and level. Once satisfied, backfill the area surrounding the edgers with soil or mulch to blend the edges seamlessly into the landscape.
To maintain your paver edgers, periodically check for any signs of movement or wear. Address issues promptly to prevent further damage and preserve the integrity of your design. Regular cleaning and occasional re-compaction of the base materials will also extend the life of your hardscape.
Read also: How many edging stones do I need?
Be a step closer to your dream outdoor space with JS Brick!

Mastering how to lay paver edgers can transform your outdoor spaces into stunning, functional areas that stand the test of time. With the right tools, meticulous preparation, and attention to detail, anyone can achieve a professional result.
But if you’re looking for expert advice or assistance in bringing your vision to life, hiring a professional hardscape contractor is the best thing you can do. So find a professional you can trust around your area.
And if you happen to be around the Sarasota County, in FL, we here at JS Brick are the best option for you. For the last 24 years, we specialize in professional hardscaping services tailored to your needs. Contact us today to explore how we can help turn your outdoor dreams into reality.


