Knowing how to use paver edging is one of the most crucial steps to ensure that a paving project not only looks stunning on day one but also maintains its integrity for years to come. While pavers themselves create the visual appeal, edging is the hidden hero that keeps everything in place.
Without proper edging, even the most beautifully laid paver patio or driveway can start shifting, sinking, or losing its clean lines over time. In this article, you will discover exactly how paver edging works, the best installation practices, and tips to guarantee a professional, lasting result.
Don’t miss: Concrete paver styles explained – which is best for your project?
Jump to:
The role of paver edging in hardscape
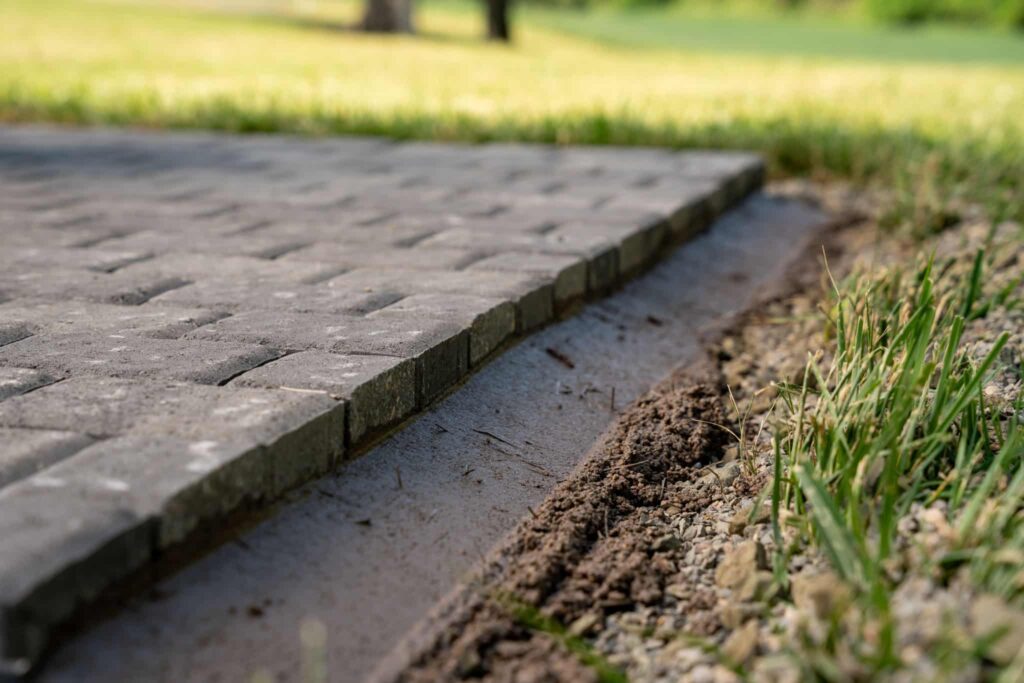
Pavers are designed to lock together, but external forces such as foot traffic, vehicle weight, and weather changes can gradually cause movement. Paver edging, in this sense, acts as a boundary – holding the structure together and preventing the spread of the stones.
This edging can be made from materials like plastic, aluminum, steel, or even concrete, depending on the desired look and structural needs. The main goal is to preserve the alignment and reduce maintenance over time.
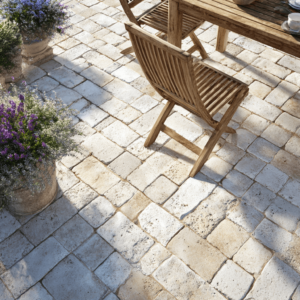
Edging also plays a significant aesthetic role, of course: a clean, defined edge makes a project look finished and well thought out. It creates a visual frame for the paving area, enhancing the design’s symmetry and elegance.
Preparing the base
It all starts long before the actual edging is installed – preparation is everything. The base beneath the pavers must be compacted and level, with a proper layer of gravel and sand. If the base is uneven or poorly compacted, edging will have a harder time holding everything in place, leading to future problems.
Before setting edging, the pavers should be laid in their final pattern, leaving just enough room at the perimeter to fit the chosen edging product. At this stage, it is wise to double-check alignment and ensure that any curves or corners in the design are properly planned out for the edging to follow smoothly.
Installation of paver edging
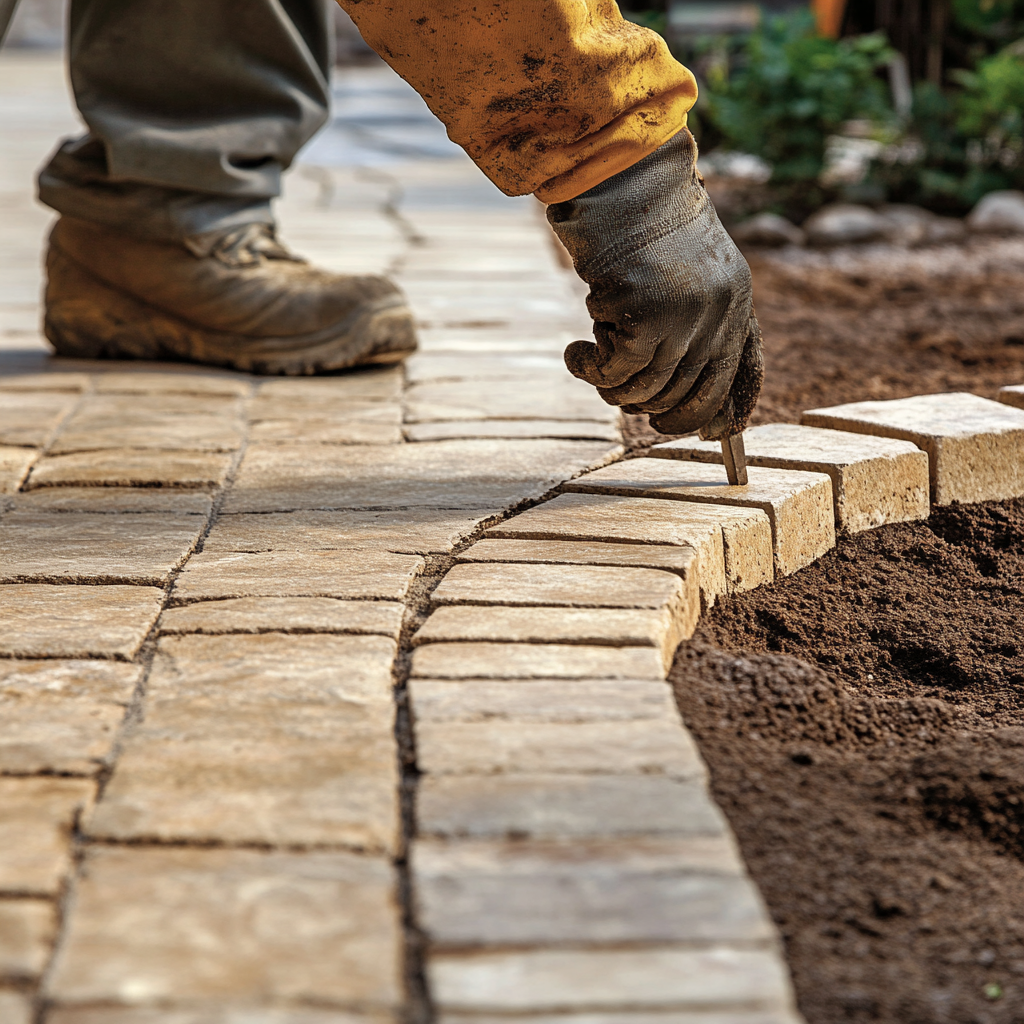
The key to mastering how to use paver edging lies in proper installation technique. Let me walk you through how I handle it on the job so you can get similar results:
- Start with a solid base: I never skip this step. If the base layer isn’t compacted and level, the spikes won’t hold the edging properly – so always check the firmness with a good stomp. If it gives under my foot, it’s not ready yet.
- Get that edging tight against the pavers: I press it in so it’s flush, no daylight between the edging and the pavers. Even the tiniest gap can let sand or soil escape, and trust me, that’ll lead to shifting down the road.
- Drive in the spikes: For most modern plastic edging, I use long landscaping spikes, evenly spaced every 8 to 12 inches. I work methodically down the line, checking alignment as I go – once those spikes are in, adjusting is a pain.
- Straight runs are the easy part: It’s just a matter of keeping the line true and the pressure against the pavers constant.
- Curves take finesse: For plastic edging, I cut little notches in the flange so it bends smoothly without kinking; when we’re talking about aluminum or steel, I use bending tools or gentle, gradual pressure to shape it. Patience is key here – forcing the curve can ruin the material.
- Final check before backfilling: Finally, I run my hand along the edging to feel for any looseness and re-drive any spikes that aren’t tight. This is the last chance to fix things before the edging disappears under soil or mulch.
Maintenance over the years
Unfortunately, hardscaping does not end with installation: maintenance is a subtle but essential part of ensuring that edging continues to perform. Over time, ground movement or freeze-thaw cycles may slightly shift sections of edging. Periodically checking for loose spikes, gaps, or areas where soil has eroded can prevent larger issues from developing.
In high-traffic areas such as driveways, the edging may endure more stress. In these cases, opting for heavier-duty materials like steel or concrete can extend the life of the installation.
Read as well: How to fix discolored pavers and restore their original beauty
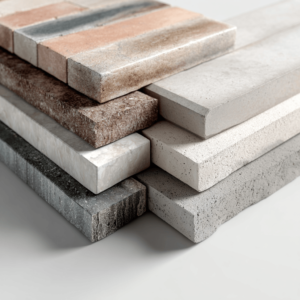
How to choose the right edging material
Selecting the right edging is just as important as installing it correctly. The right choice balances appearance, durability, and cost – and ensures your project stays looking great for years.
| Material | Best For | Pros | Cons |
|---|---|---|---|
| Plastic | DIY projects, light-use paths, garden borders | Lightweight, affordable, easy to install, flexible for curves | Less durable under heavy traffic, may shift over time |
| Aluminum | Residential patios, decorative walkways | Sleek modern look, won’t rust, easy to bend for curves | Higher cost than plastic, not as strong as steel |
| Steel | High-traffic areas, driveways, commercial spaces | Extremely durable, professional finish, resists shifting | Heavier, harder to install, susceptible to rust if not coated |
| Concrete Curbing | Permanent installations, heavy-duty reinforcement | Unmatched strength, long lifespan, fully customizable | Labor-intensive, requires skill and equipment, higher cost |
As you can see, each material has its own pros and cons; the choice should balance aesthetics, budget, and expected usage. For example, a garden walkway may only require simple plastic edging, while a commercial parking lot might benefit from steel or concrete reinforcement.
For those unsure which option will truly deliver the best results, JS Brick provides expert guidance backed by decades of hands-on experience in Sarasota!
My colleagues and I not only understand the technical aspects of how to use paver edging but also have access to top-grade materials sourced from trusted suppliers, which ensures that every project benefits from the perfect combination of durability, performance, and appearance. This gives homeowners and businesses peace of mind that their investment will look beautiful and stand strong for years to come!
Advanced techniques for a perfect edging
In case you aim for a truly professional and refined look, I can share a few more tips with you regarding advanced installation techniques for your project.
One particularly effective approach involves setting the edging slightly below the paver surface so that it remains completely hidden from view, for example. This technique still provides the same structural support but creates a clean, uninterrupted visual line across the paving area. The result is a sleek, seamless finish that feels intentional and high-end, which is why it is a favorite among homeowners, landscape architects, and professional designers.
Another advanced method is integrating the edging into surrounding landscaping features. By aligning the edging with adjacent flower beds, stone garden borders, or retaining walls, it becomes an organic part of the overall outdoor design rather than a separate element. This not only improves the visual flow but also enhances the structural integrity of the paver installation, as these connected features work together to hold the pavers firmly in place.

In some cases, edging can even be color-matched or textured to coordinate with other materials in the space, further reinforcing a cohesive design. These approaches combine functionality with artistry, elevating any project from standard to truly exceptional.
Why a professional installation makes all the difference
Now you know how to use paver edging!
But don’t be fooled: while it may seem a simple task at first glance, achieving a flawless and long-lasting finish often requires much more than just following basic instructions, especially if you’re a beginner in hardscape endeavors. Experienced professionals like us at JS Brick know how to adapt edging techniques to the unique conditions of each site, whether it involves sloped terrain, irregular shapes, or soil with varying levels of stability.
They can work with different edging materials efficiently, selecting the right one for durability and aesthetics, and ensuring that it is installed with precision. Professionals also have access to high-quality tools, specialized spikes, and premium edging products that are often unavailable at standard retail stores.
Beyond that, a skilled installer can anticipate potential issues before they escalate, such as poor drainage, soil erosion, or shifting ground, ensuring that the edging remains strong and supportive for the pavers for many years without costly or invasive repairs.
Contact JS Brick today for professional help!
If you want the peace of mind that comes with professional results, don’t hesitate: JS Brick is ready to help. With decades of experience in paver installation and maintenance in Sarasota, we combine quality craftsmanship with attention to detail. Learn more about our services and explore our projects on the website – or contact us directly for a free quote.