Permeable pavers have recently conquered the hearts of many homeowners by being an environmentally friendly and visually appealing solution for driveways, walkways, patios, and parking areas. If you already know that, then you must be wondering how to install permeable pavers and get all the benefits these products offer.
Unlike traditional pavers, permeable pavers allow rainwater to infiltrate into the ground, reducing runoff and preventing erosion. With proper planning and investment, this water can even be filtered and stored to be used later on.
Installing permeable pavers is a project that can enhance both the functionality and aesthetics of your outdoor space while contributing to sustainability. In this guide, we’ll walk you through the process of installing permeable pavers, step by step.
You might also like: Travertine Pavers Around the Pool – All You Need to Know
Jump to:
How to install permeable pavers: materials
First, let’s give you a comprehensive list of all the materials you’re going to need for the installation.
- Crushed Stone
Use crushed stone with angular edges, typically 3/4 inch (19 mm) in size. It should be compacted well to create a stable base. - Geotextile Fabric
This fabric helps prevent the migration of fines from the underlying soil into the base material while still allowing water to pass through. - Edge Restraints
These are used to keep the pavers in place and prevent them from shifting over time. Options include plastic or metal paver edging. - Bedding Sand
A layer of bedding sand is placed over the base material to provide a smooth, even surface for laying the pavers. - Joint Material
The gaps between the pavers are filled with a permeable joint material that allows water to pass through. Options include crushed stone, stone dust, or specially designed permeable joint materials. - Compactor
You’ll need a plate compactor or a hand tamper to compact the base material and pavers properly. - Leveling Tools
Tools like a straight edge, a bubble level, and a rubber mallet are essential for ensuring the pavers are level and evenly spaced. - Landscape Fabric
This can be placed under the base material to further prevent weed growth. - Drainage Aggregate
Depending on the local soil conditions and drainage requirements, you may need additional drainage aggregate layers to facilitate water infiltration. - Perimeter Drainage
In some cases, you may need a perimeter drain or French drain to manage excess water runoff. - Excavation Equipment
Shovels, wheelbarrows, and a bobcat or mini-excavator may be necessary for excavation and moving materials. - Safety Gear
Personal protective equipment, such as gloves, safety glasses, and appropriate footwear, is essential when working with construction materials.
Step 1: Planning
Planning is a crucial first step in any successful permeable paver installation project. This phase involves a series of meticulous tasks and considerations to ensure that the final result not only looks aesthetically pleasing but also functions effectively in terms of water management and stability.
Begin by thoroughly assessing the site where you intend to install the permeable pavers. Take note of existing conditions, including the terrain, soil type, and vegetation.
Accurate measurements are paramount, so use precise measuring tools to determine the dimensions of the area you plan to cover with permeable pavers. Sketch a detailed layout of the area to scale, marking any existing structures, trees, or other obstacles.
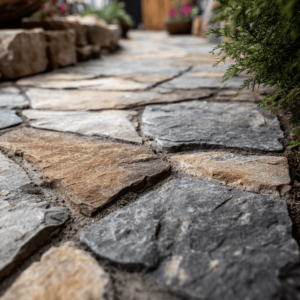
Consider the type of permeable pavers you want to use. There are various options, including concrete, brick, or stone pavers, each with its own aesthetic and functional advantages. Your choice should align with your project goals and budget.
Decide on the pattern and design of the pavers. This is where you can get creative. Experiment with various layout options to find the one that best complements your property’s aesthetics. Common patterns include herringbone, basketweave, and running bond.
Evaluate the site’s natural drainage patterns. Determine the slope of the area and identify the direction in which water flows during rainfall. This information is vital for proper water management and to prevent water pooling on the paver surface.
Consider the type of substrate and base you will need to prepare beneath the pavers. This might involve excavation, soil stabilization, and the installation of layers of aggregate and filter fabric to facilitate proper drainage.
Check local building codes and regulations to ensure compliance with any permits or approvals required for your permeable paver installation. Depending on your location, there may be specific guidelines for permeable paving projects.
Create a detailed budget that covers all aspects of the project, including materials, labor, and any additional costs such as drainage solutions. Research the prices of materials and labor in your area to ensure your budget is accurate.
Develop a project timeline that outlines when each phase of the installation will occur. Keep in mind factors such as weather and availability of materials and labor when creating your schedule.
Step 2: excavation and base preparation
Excavating for a permeable paver installation is a crucial step to ensure proper drainage and the longevity of your project. Permeable pavers allow water to pass through, reducing runoff and helping manage stormwater.
Outline the area where you want to install the permeable pavers using string lines and stakes. Consider the desired slope for proper drainage, typically around 1-2% grade away from structures. The depth of excavation for permeable pavers varies but is usually around 12–18 inches.
Lay geotextile fabric over the excavated area. This fabric helps prevent weed growth and stabilizes the base layers.
Spread a layer of crushed stone or aggregate base material over the geotextile fabric. The thickness of this layer depends on your project, but it’s typically around 4–6 inches. Use a plate tamper or compactor to compact the base material thoroughly, creating a stable foundation.
Ensure the compacted base has the correct slope for drainage. Use a level and string lines to verify the slope is consistent throughout the area.
Spread a 1-inch layer of clean, angular gravel (pea gravel) evenly over the compacted base. This layer helps create a level surface for the permeable pavers.
Use a screed board to level the gravel bed. The screed board should rest on the edge of the pavers you plan to install, ensuring a consistent depth.
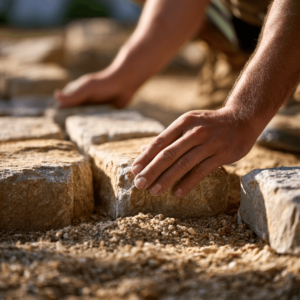
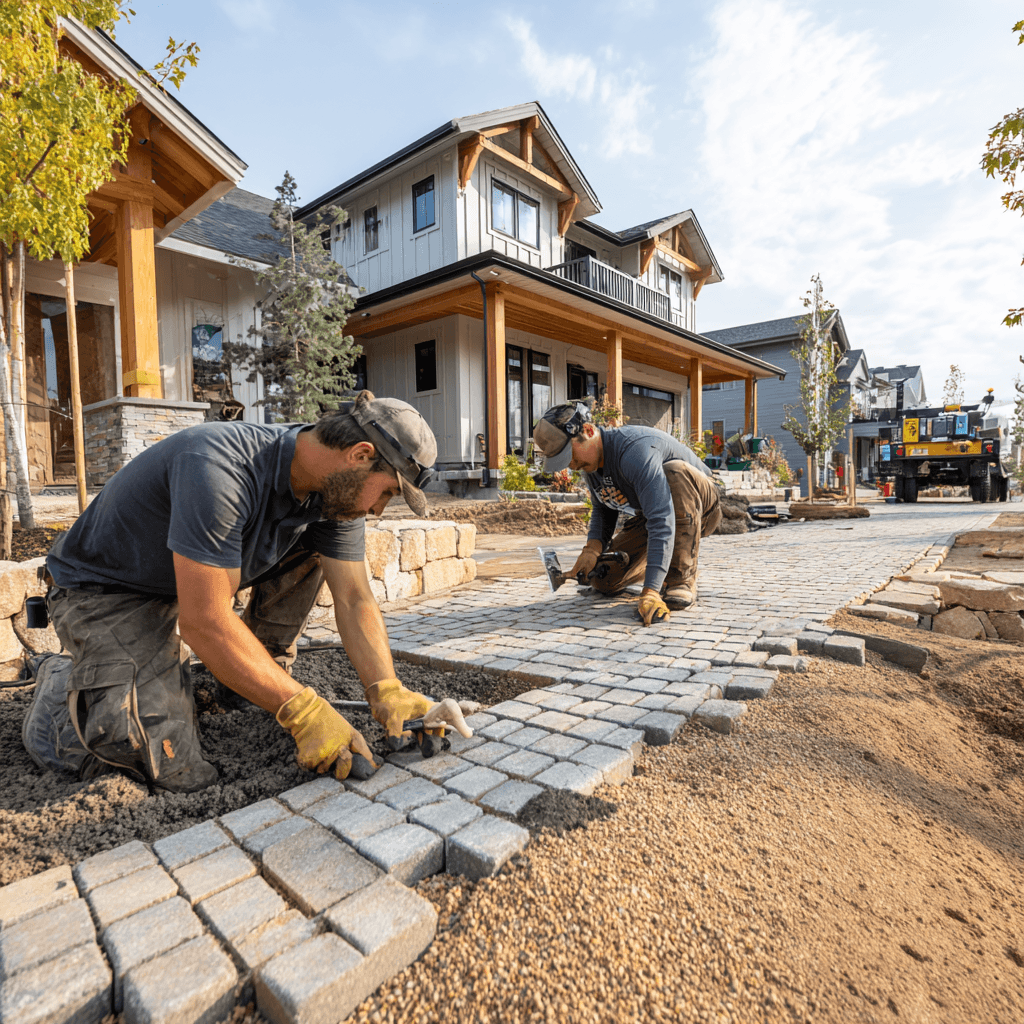
Step 3: setting the pavers and edge restraints
Now that you’ve prepared the base and made the necessary adjustments in the previous steps, it’s time to lay your permeable pavers.
Start at one corner or edge of your project area and begin laying the pavers in the chosen pattern. Place them gently on the prepared base, ensuring that the gaps between the pavers are consistent and visually appealing. These gaps are essential for water infiltration.
To achieve a smooth and even surface, regularly check the alignment and level of the pavers as you lay them. A bubble level or a laser level can be handy tools for this purpose. Make adjustments as needed to maintain a consistent slope for proper drainage.
Once a section of pavers is laid, use a mechanical plate compactor to gently tap the pavers into the base material. This helps set them firmly in place and ensures they are level. Continue this process as you lay more pavers.
Once your pavers are in place, is time to install the edge restrains.
Dig a trench along the perimeter of your paver installation that is slightly wider and deeper than the edge restraints you’ll be using. This trench should accommodate the restraints snugly.
Place the edge restraints into the trench. They should sit flush with the top of the pavers and protrude slightly above the ground to secure the pavers in place. If necessary, cut the restraints to the desired length using a saw.
To keep the edge restraints in place, use wooden stakes or metal spikes at regular intervals along the length of the restraint. Hammer these stakes or spikes through the holes or openings in the restraints into the ground below. Ensure they are firmly anchored.
Fill the trench with soil or gravel up to the level of the edge restraints. Compact the backfill material to ensure it’s stable.
Step 04: filling joints
Now that you’ve meticulously laid your pavers into place, it’s time to ensure they’re not just visually appealing, but also structurally sound. The critical step here is filling the gaps between the pavers with fine sand.
Begin by pouring the sand over the paver surface, making sure it gets into all the gaps between the pavers. You may want to use a small shovel or your hands to help guide the sand into these spaces.
To firmly secure the pavers and ensure the sand settles evenly, use a plate compactor. Gently run the compactor over the surface, making sure not to apply excessive force that could damage the pavers.
This compaction process helps to eliminate voids in the sand and enhances the overall stability of your paver surface.
Continue adding sand and compacting until the gaps are entirely filled. Be patient during this step, as it’s crucial for the long-term durability of your paver project. Make sure that the pavers are level and secure.
After compacting, there may be excess sand on the surface of the pavers. Using a stiff broom, sweep away this excess sand.
Install your permeable pavers today
Hopefully, now you have a better idea of how to install permeable pavers.
As you can see, it is not an easy task – especially if you have no previous experience with hardscape projects. If that’s your case, your best course of action is to hire professional hardscape contractors to help you.
A permeable paver installation is a costly matter, so you want to make sure your investment is well-protected. Hiring professionals to make sure everything goes as perfectly as possible is the safest route to that.
And if you are located around Sarasota, FL, you can always count on us here at JS Brick to help you. We 23 years of experience, we are ready to help you with your permeable paver installation and any other hardscape needs you may have.
You can contact us anytime for a free estimate on our services and to start your permeable paver installation today!