Paver walls can be a great element for your outdoor area. They create a beautiful and usable garden space and help with water drainage and soil erosion. The process of laying a paver wall can be completed in a few days thanks to the interlocking, stackable blocks.
But don’t get mistaken, the process is fast but not easy at all! Laying a paver wall is a tough job since you might need to do some heavy lifting of the blocks and get very dirty.
If you have no idea how to lay a paver wall, read more about it below and find out all the building process steps.
Jump to:
How to lay a paver wall?
Before laying a paver wall, you might need some materials and tools first. For this project, you will need:
- Work gloves
- Shovel
- Torpedo level
- Pavers or blocks
- Wooden stakes
- String and a line level
- Masonry blade
- Soil tamper
- Rubber mallet
- Gravel
- Landscape fabric
- Interlocking stackable stones and toppers
- Safety gloves, glasses, and mask
- Hearing protection
Now that you have all the needed tools and materials. It’s time to lay a paver wall!
Step 1: Dig for the first row
The first thing you need to do is excavate. With the layout marked with the wooden stakes, dig the trench about 6 inches deep and twice the width of the blocks you chose.
Step 2: Adjust for sloping and level the ground
If the trench slopes, you’ll have to step up or down to keep the blocks level. You can use a torpedo level to create steps so that each section of the wall remains level. Then, with a hand tamper, tamp down the ground.
Step 3: Add gravel
Fill the trench with about 3 inches of gravel and then tamp it down again until it’s all level, then you can begin installing the blocks by rows.
Step 4: Prepare the first row and level the first block
For the first row, knock off the flanges with a hammer and chisel so the blocks will sit flat. If the trench slopes, use a torpedo level to create steps so that each section of the wall remains level.
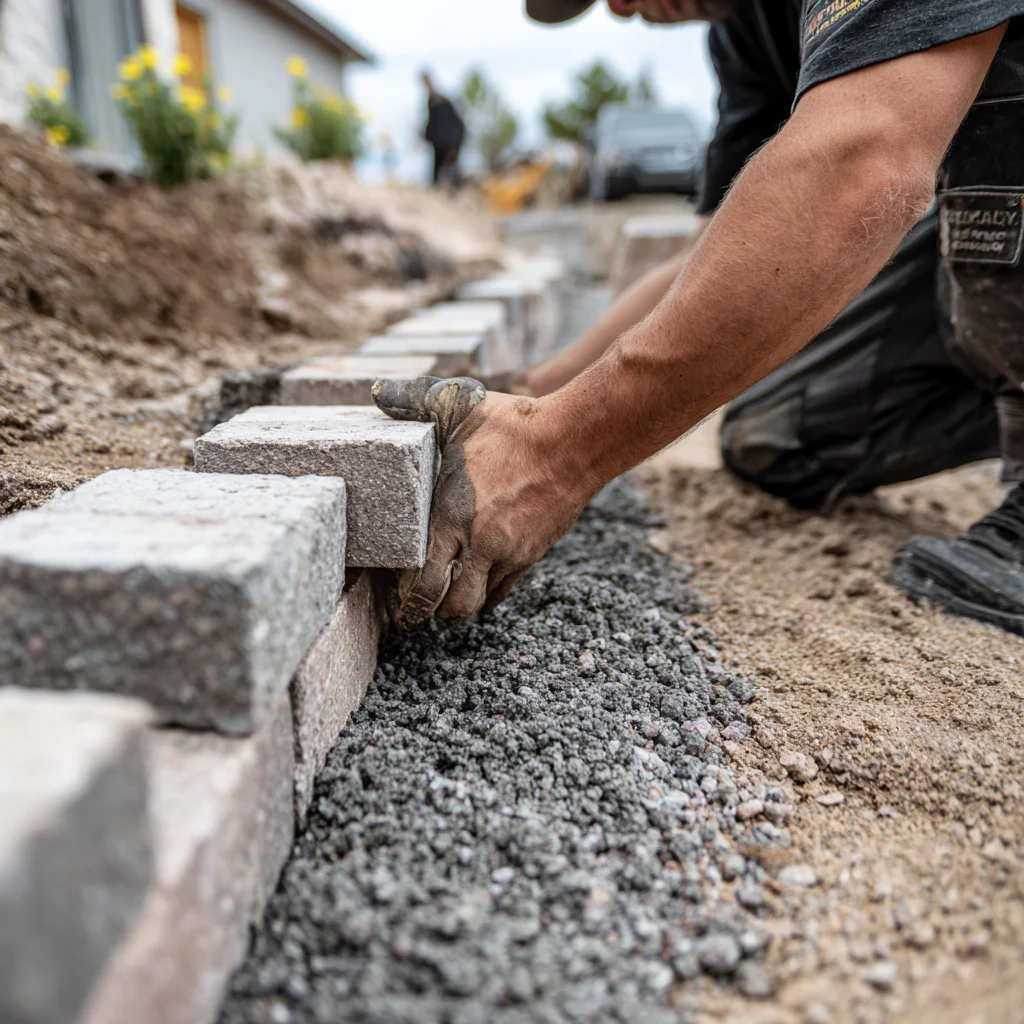
Step 7: Lay the first row of block
After level, place the next block, always making sure it’s even with the first. Continue to install the first row, continuously checking for level after each block.
Step 8: Adjust for level
Tap down high blocks with a rubber mallet or fill in under low blocks with gravel, to keep the blocks even and level the rows.
Step 9: Start the second row
After installing each row, sweep all the dirt off from the tops. Then, mark and cut a block with a mansory blade to stagger the joints. Lay the blocks in place, always making sure the stone’s lip is tight against the block below it and making sure the seams are offset. Again: Don’t forget to always check the level.
For this step, don’t forget to wear safety glasses, gloves, hearing protection, and a safety mask to cut the blocks!
Step 10: Add landscape fabric (optional)
If you want to add drainage behind the blocks, after installing the next few rows, lay down landscape fabric behind the wall, the fabric must be big enough to reach the top of the blocks. Then, backfill the area behind the wall in layers, first with gravel and then with dirt.
Step 11: Apply adhesive
Apply concrete adhesive on the top of the blocks for the last two rows, then set the next row of blocks in place.
Can I build a paver wall alone?
As you can see, laying a paver wall requires so much more than just stacking the blocks, you have to be aware of a lot of details, such as preventing floods and soil erosion in the area and also preventing the wall from breaking, so we highly recommend you not to do it by yourself.
If you do it by yourself, you can cut some expenses, but the chances of something going wrong are pretty high and risky, so the price of doing the project yourself is just not worth it.
If you hire a professional, your wall will have guaranteed quality, longevity, and beauty. We understand if you are worried about the price, so you can get a free estimate for your project.
At JS Brick we have more than 20 years of experience providing paver installation, supply, and maintenance services in Sarasota and surrounding cities. For a free estimate on your project, don’t hesitate and contact us!